
Torward is an improved version based on the torghost-gn and darktor scripts, designed to enhance anonymity on the Internet. The tool prevents data leaks and forces all traffic from our computer to be routed exclusively through the Tor network, providing a high level of privacy in our connections.
git clone https://github.com/chundefined/Torward.git
cd Torward
chmod +x install.sh
./install.sh
This version includes several key security improvements to protect your identity and ensure better network configuration:
IPv6 Leak Prevention
IPv6 is now disabled to prevent any potential IP leaks. All traffic is forced through the Tor network by modifying system IPv6 settings in network_config.py.
Enhanced iptables Rules
Strict iptables rules are implemented to ensure only Tor traffic is allowed. Non-Tor traffic is blocked, DNS queries are routed through Tor, and only essential connections to Tor ports are permitted. Additionally, IPv6 traffic is blocked to prevent leaks.
Tor Configuration Adjustments
The torward file has been updated to enforce that all traffic, including DNS queries, is routed through Tor, improving anonymity.
The Russia-based cybercrime group dubbed “Fin7,” known for phishing and malware attacks that have cost victim organizations an estimated $3 billion in losses since 2013, was declared dead last year by U.S. authorities. But experts say Fin7 has roared back to life in 2024 — setting up thousands of websites mimicking a range of media and technology companies — with the help of Stark Industries Solutions, a sprawling hosting provider that is a persistent source of cyberattacks against enemies of Russia.
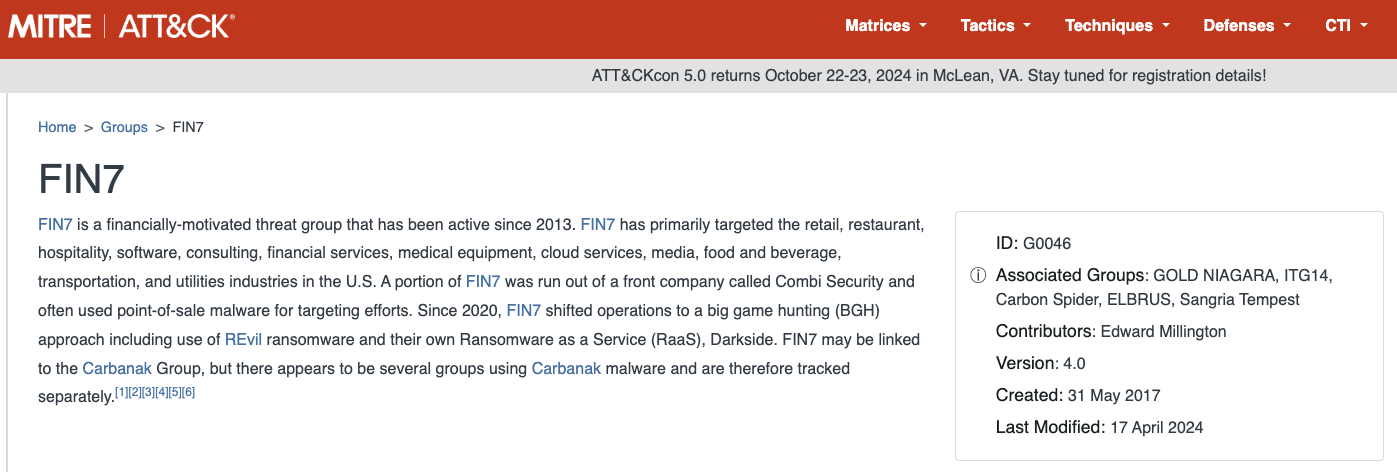
In May 2023, the U.S. attorney for Washington state declared “Fin7 is an entity no more,” after prosecutors secured convictions and prison sentences against three men found to be high-level Fin7 hackers or managers. This was a bold declaration against a group that the U.S. Department of Justice described as a criminal enterprise with more than 70 people organized into distinct business units and teams.
The first signs of Fin7’s revival came in April 2024, when Blackberry wrote about an intrusion at a large automotive firm that began with malware served by a typosquatting attack targeting people searching for a popular free network scanning tool.
Now, researchers at security firm Silent Push say they have devised a way to map out Fin7’s rapidly regrowing cybercrime infrastructure, which includes more than 4,000 hosts that employ a range of exploits, from typosquatting and booby-trapped ads to malicious browser extensions and spearphishing domains.
Silent Push said it found Fin7 domains targeting or spoofing brands including American Express, Affinity Energy, Airtable, Alliant, Android Developer, Asana, Bitwarden, Bloomberg, Cisco (Webex), CNN, Costco, Dropbox, Grammarly, Google, Goto.com, Harvard, Lexis Nexis, Meta, Microsoft 365, Midjourney, Netflix, Paycor, Quickbooks, Quicken, Reuters, Regions Bank Onepass, RuPay, SAP (Ariba), Trezor, Twitter/X, Wall Street Journal, Westlaw, and Zoom, among others.
Zach Edwards, senior threat analyst at Silent Push, said many of the Fin7 domains are innocuous-looking websites for generic businesses that sometimes include text from default website templates (the content on these sites often has nothing to do with the entity’s stated business or mission).
Edwards said Fin7 does this to “age” the domains and to give them a positive or at least benign reputation before they’re eventually converted for use in hosting brand-specific phishing pages.
“It took them six to nine months to ramp up, but ever since January of this year they have been humming, building a giant phishing infrastructure and aging domains,” Edwards said of the cybercrime group.
In typosquatting attacks, Fin7 registers domains that are similar to those for popular free software tools. Those look-alike domains are then advertised on Google so that sponsored links to them show up prominently in search results, which is usually above the legitimate source of the software in question.
A malicious site spoofing FreeCAD showed up prominently as a sponsored result in Google search results earlier this year.
According to Silent Push, the software currently being targeted by Fin7 includes 7-zip, PuTTY, ProtectedPDFViewer, AIMP, Notepad++, Advanced IP Scanner, AnyDesk, pgAdmin, AutoDesk, Bitwarden, Rest Proxy, Python, Sublime Text, and Node.js.
In May 2024, security firm eSentire warned that Fin7 was spotted using sponsored Google ads to serve pop-ups prompting people to download phony browser extensions that install malware. Malwarebytes blogged about a similar campaign in April, but did not attribute the activity to any particular group.
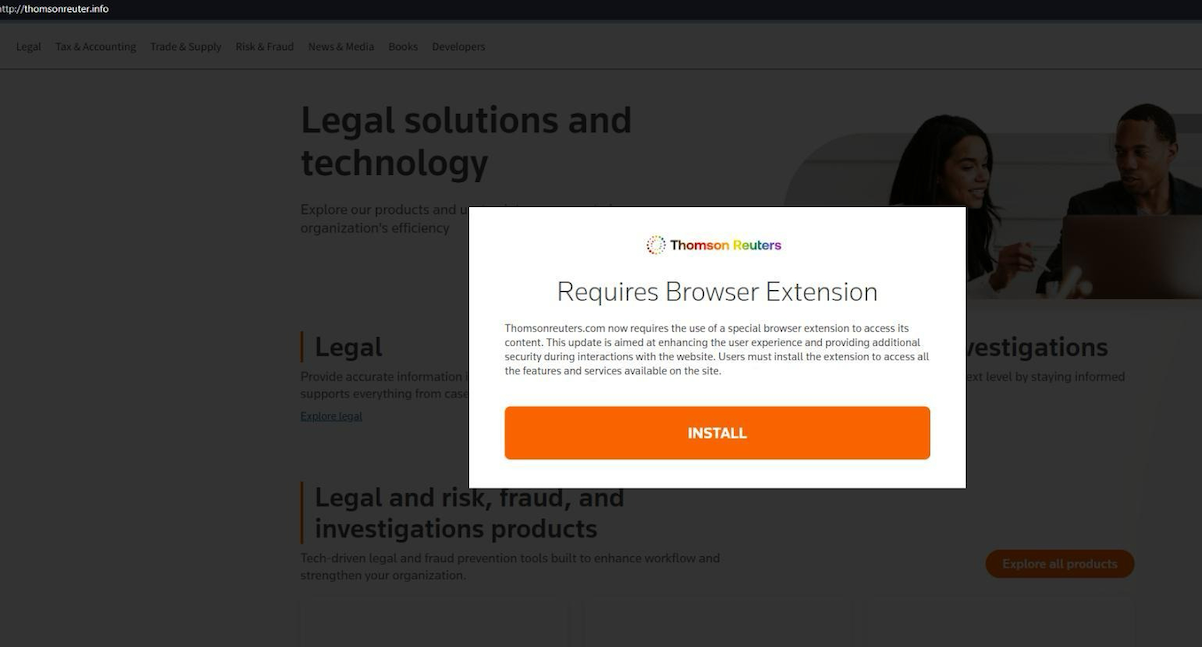
A pop-up at a Thomson Reuters typosquatting domain telling visitors they need to install a browser extension to view the news content.
Edwards said Silent Push discovered the new Fin7 domains after a hearing from an organization that was targeted by Fin7 in years past and suspected the group was once again active. Searching for hosts that matched Fin7’s known profile revealed just one active site. But Edwards said that one site pointed to many other Fin7 properties at Stark Industries Solutions, a large hosting provider that materialized just two weeks before Russia invaded Ukraine.
As KrebsOnSecurity wrote in May, Stark Industries Solutions is being used as a staging ground for wave after wave of cyberattacks against Ukraine that have been tied to Russian military and intelligence agencies.
“FIN7 rents a large amount of dedicated IP on Stark Industries,” Edwards said. “Our analysts have discovered numerous Stark Industries IPs that are solely dedicated to hosting FIN7 infrastructure.”
Fin7 once famously operated behind fake cybersecurity companies — with names like Combi Security and Bastion Secure — which they used for hiring security experts to aid in ransomware attacks. One of the new Fin7 domains identified by Silent Push is cybercloudsec[.]com, which promises to “grow your business with our IT, cyber security and cloud solutions.”
The fake Fin7 security firm Cybercloudsec.
Like other phishing groups, Fin7 seizes on current events, and at the moment it is targeting tourists visiting France for the Summer Olympics later this month. Among the new Fin7 domains Silent Push found are several sites phishing people seeking tickets at the Louvre.
“We believe this research makes it clear that Fin7 is back and scaling up quickly,” Edwards said. “It’s our hope that the law enforcement community takes notice of this and puts Fin7 back on their radar for additional enforcement actions, and that quite a few of our competitors will be able to take this pool and expand into all or a good chunk of their infrastructure.”
Further reading:
Stark Industries Solutions: An Iron Hammer in the Cloud.
A 2022 deep dive on Fin7 from the Swiss threat intelligence firm Prodaft (PDF).
![]()
A vulnerable application made using node.js, express server and ejs template engine. This application is meant for educational purposes only.
git clone https://github.com/4auvar/VulnNodeApp.git
npm install
CREATE USER 'vulnnodeapp'@'localhost' IDENTIFIED BY 'password';
create database vuln_node_app_db;
GRANT ALL PRIVILEGES ON vuln_node_app_db.* TO 'vulnnodeapp'@'localhost';
USE vuln_node_app_db;
create table users (id int AUTO_INCREMENT PRIMARY KEY, fullname varchar(255), username varchar(255),password varchar(255), email varchar(255), phone varchar(255), profilepic varchar(255));
insert into users(fullname,username,password,email,phone) values("test1","test1","test1","test1@test.com","976543210");
insert into users(fullname,username,password,email,phone) values("test2","test2","test2","test2@test.com","9887987541");
insert into users(fullname,username,password,email,phone) values("test3","test3","test3","test3@test.com","9876987611");
insert into users(fullname,username,password,email,phone) values("test4","test4","test4","test4@test.com","9123459876");
insert into users(fullname,username,password,email,phone) values("test5","test5","test   5","test5@test.com","7893451230");
npm start
You can reach me out at @4auvar
Nodesub is a command-line tool for finding subdomains in bug bounty programs. It supports various subdomain enumeration techniques and provides flexible options for customization.
To install Nodesub, use the following command:
npm install -g nodesub
NOTE:
~/.config/nodesub/config.ini
nodesub -h
This will display help for the tool. Here are all the switches it supports.
Enumerate subdomains for a single domain:
nodesub -u example.com
Enumerate subdomains for a list of domains from a file:
nodesub -l domains.txt
Perform subdomain enumeration using CIDR:
node nodesub.js -c 192.168.0.0/24 -o subdomains.txt
node nodesub.js -c CIDR.txt -o subdomains.txt
Perform subdomain enumeration using ASN:
node nodesub.js -a AS12345 -o subdomains.txt
node nodesub.js -a ASN.txt -o subdomains.txt
Enable recursive subdomain enumeration and output the results to a JSON file:
nodesub -u example.com -r -o output.json -f json
The tool provides various output formats for the results, including:
The output file contains the resolved subdomains, failed resolved subdomains, or all subdomains based on the options chosen.

Focused on protecting highly sensitive data, temcrypt is an advanced multi-layer data evolutionary encryption mechanism that offers scalable complexity over time, and is resistant to common brute force attacks.
You can create your own applications, scripts and automations when deploying it.
Find out what temcrypt stands for, the features and inspiration that led me to create it and much more. READ THE KNOWLEDGE DOCUMENT. This is very important to you.
temcrypt is compatible with both Node.js v18 or major, and modern web browsers, allowing you to use it in various environments.
The only dependencies that temcrypt uses are crypto-js for handling encryption algorithms like AES-256, SHA-256 and some encoders and fs is used for file handling with Node.js
To use temcrypt, you need to have Node.js installed. Then, you can install temcrypt using npm:
npm install temcryptafter that, import it in your code as follows:
const temcrypt = require("temcrypt");Includes an auto-install feature for its dependencies, so you don't have to worry about installing them manually. Just run the temcrypt.js library and the dependencies will be installed automatically and then call it in your code, this was done to be portable:
node temcrypt.jsAlternatively, you can use temcrypt directly in the browser by including the following script tag:
<script src="temcrypt.js"></script>or minified:
<script src="temcrypt.min.js"></script>You can also call the library on your website or web application from a CDN:
<script src="https://cdn.jsdelivr.net/gh/jofpin/temcrypt/temcrypt.min.js"></script>temcrypt provides functions like encrypt and decrypt to securely protect and disclose your information.
Parameters
dataString (string): The string data to encrypt.dataFiles (string): The file path to encrypt. Provide either dataString or dataFiles.mainKey (string): The main key (private) for encryption.extraBytes (number, optional): Additional bytes to add to the encryption. Is an optional parameter used in the temcrypt encryption process. It allows you to add extra bytes to the encrypted data, increasing the complexity of the encryption, which requires more processing power to decrypt. It also serves to make patterns lose by changing the weight of the encryption.
Returns
status (boolean): true to indicate successful decryption.hash (string): The unique hash generated for the legitimacy verify of the encrypted data.dataString (string) or dataFiles: The decrypted string or the file path of the decrypted file, depending on the input.updatedEncryptedData (string): The updated encrypted data after decryption. The updated encrypted data after decryption. Every time the encryption is decrypted, the output is updated, because the mainKey changes its order and the new date of last decryption is saved.creationDate (string): The creation date of the encrypted data.lastDecryptionDate (string): The date of the last successful decryption of the data.dataString is provided: hash (string): The unique hash generated for the legitimacy verify of the encrypted data.mainKey (string): The main key (private) used for encryption.timeKey (string): The time key (private) of the encryption.dataString (string): The encrypted string.extraBytes (number, optional): The extra bytes used for encryption.dataFiles is provided: hash (string): The unique hash generated for the legitimacy verify of the encrypted data.mainKey (string): The main key used for encryption.timeKey (string): The time key of the encryption.dataFiles (string): The file path of the encrypted file.extraBytes (number, optional): The extra bytes used for encryption.status (boolean): false to indicate decryption failure.error_code (number): An error code indicating the reason for decryption failure.message (string): A descriptive error message explaining the decryption failure.Here are some examples of how to use temcrypt. Please note that when encrypting, you must enter a key and save the hour and minute that you encrypted the information. To decrypt the information, you must use the same main key at the same hour and minute on subsequent days:
const dataToEncrypt = "Sensitive data";
const mainKey = "your_secret_key"; // Insert your custom key

const encryptedData = temcrypt.encrypt({
  dataString: dataToEncrypt,
  mainKey: mainKey
});

console.log(encryptedData);const encryptedData = "..."; // Encrypted data obtained from the encryption process
const mainKey = "your_secret_key";
const decryptedData = temcrypt.decrypt({
dataString: encryptedData,
mainKey: mainKey
});
console.log(decryptedData);Encrypt a File:
To encrypt a file using temcrypt, you can use the encrypt function with the dataFiles parameter. Here's an example of how to encrypt a file and obtain the encryption result:
const temcrypt = require("temcrypt");

const filePath = "path/test.txt";
const mainKey = "your_secret_key";

const result = temcrypt.encrypt({
  dataFiles: filePath,
  mainKey: mainKey,
  extraBytes: 128 // Optional: Add 128 extra bytes
});

console.log(result);
In this example, replace 'test.txt' with the actual path to the file you want to encrypt and set 'your_secret_key' as the main key for the encryption. The result object will contain the encryption details, including the unique hash, main key, time key, and the file path of the encrypted file.
Decrypt a File:
To decrypt a file that was previously encrypted with temcrypt, you can use the decrypt function with the dataFiles parameter. Here's an example of how to decrypt a file and obtain the decryption result:
const temcrypt = require("temcrypt");

const filePath = "path/test.txt.trypt";
const mainKey = "your_secret_key";

const result = temcrypt.decrypt({
  dataFiles: filePath,
  mainKey: mainKey
});

console.log(result);
In this example, replace 'path/test.txt.trypt' with the actual path to the encrypted file, and set 'your_secret_key' as the main key for decryption. The result object will contain the decryption status and the decrypted data, if successful.
Remember to provide the correct main key used during encryption to successfully decrypt the file, at the exact same hour and minute that it was encrypted. If the main key is wrong or the file was tampered with or the time is wrong, the decryption status will be false and the decrypted data will not be available.
temcrypt provides utils functions to perform additional operations beyond encryption and decryption. These utility functions are designed to enhance the functionality and usability.
Function List:
Below, you can see the details and how to implement its uses.
Update MainKey:
The changeKey utility function allows you to change the mainKey used to encrypt the data while keeping the encrypted data intact. This is useful when you want to enhance the security of your encrypted data or update the mainKey periodically.
dataFiles (optional): The path to the file that was encrypted using temcrypt.dataString (optional): The encrypted string that was generated using temcrypt.mainKey (string): The current mainKey used to encrypt the data.newKey(string): The new mainKey that will replace the current mainKey.const temcrypt = require("temcrypt");
const filePath = "test.txt.trypt";
const currentMainKey = "my_recent_secret_key";
const newMainKey = "new_recent_secret_key";
// Update mainKey for the encrypted file
const result = temcrypt.utils({
changeKey: {
dataFiles: filePath,
mainKey: currentMainKey,
newKey: newMainKey
}
});
console.log(result.message);Check Data Integrity:
The check utility function allows you to verify the integrity of the data encrypted using temcrypt. It checks whether a file or a string is a valid temcrypt encrypted data.
dataFiles (optional): The path to the file that you want to check.dataString (optional): The encrypted string that you want to check.const temcrypt = require("temcrypt");
const filePath = "test.txt.trypt";
const encryptedString = "..."; // Encrypted string generated by temcrypt
// Check the integrity of the encrypted File
const result = temcrypt.utils({
check: {
dataFiles: filePath
}
});
console.log(result.message);
// Check the integrity of the encrypted String
const result2 = temcrypt.utils({
check: {
dataString: encryptedString
}
});
console.log(result2.message);Verify Hash:
The verify utility function allows you to verify the integrity of encrypted data using its hash value. Checks if the encrypted data output matches the provided hash value.
hash (string): The hash value to verify against.dataFiles (optional): The path to the file whose hash you want to verify.dataString (optional): The encrypted string whose hash you want to verify.const temcrypt = require("temcrypt");
const filePath = "test.txt.trypt";
const hashToVerify = "..."; // The hash value to verify
// Verify the hash of the encrypted File
const result = temcrypt.utils({
verify: {
hash: hashToVerify,
dataFiles: filePath
}
});
console.log(result.message);
// Verify the hash of the encrypted String
const result2 = temcrypt.utils({
verify: {
hash: hashToVerify,
dataString: encryptedString
}
});
console.log(result2.message);The following table presents the important error codes and their corresponding error messages used by temcrypt to indicate various error scenarios.
| Code | Error Message | Description |
|---|---|---|
| 420 | Decryption time limit exceeded | The decryption process took longer than the allowed time limit. |
| 444 | Decryption failed | The decryption process encountered an error. |
| 777 | No data provided | No data was provided for the operation. |
| 859 | Invalid temcrypt encrypted string | The provided string is not a valid temcrypt encrypted string. |
Check out the examples directory for more detailed usage examples.
WARNINGThe encryption size of a string or file should be less than 16 KB (kilobytes). If it's larger, you must have enough computational power to decrypt it. Otherwise, your personal computer will exceed the time required to find the correct main key combination and proper encryption formation, and it won't be able to decrypt the information.
TIPS
- With temcrypt you can only decrypt your information in later days with the key that you entered at the same hour and minute that you encrypted.
- Focus on time, it is recommended to start the decryption between the first 2 to 10 seconds, so you have an advantage to generate the correct key formation.
The content of this project itself is licensed under the Creative Commons Attribution 3.0 license, and the underlying source code used to format and display that content is licensed under the MIT license.
Copyright (c) 2023 by Jose Pino